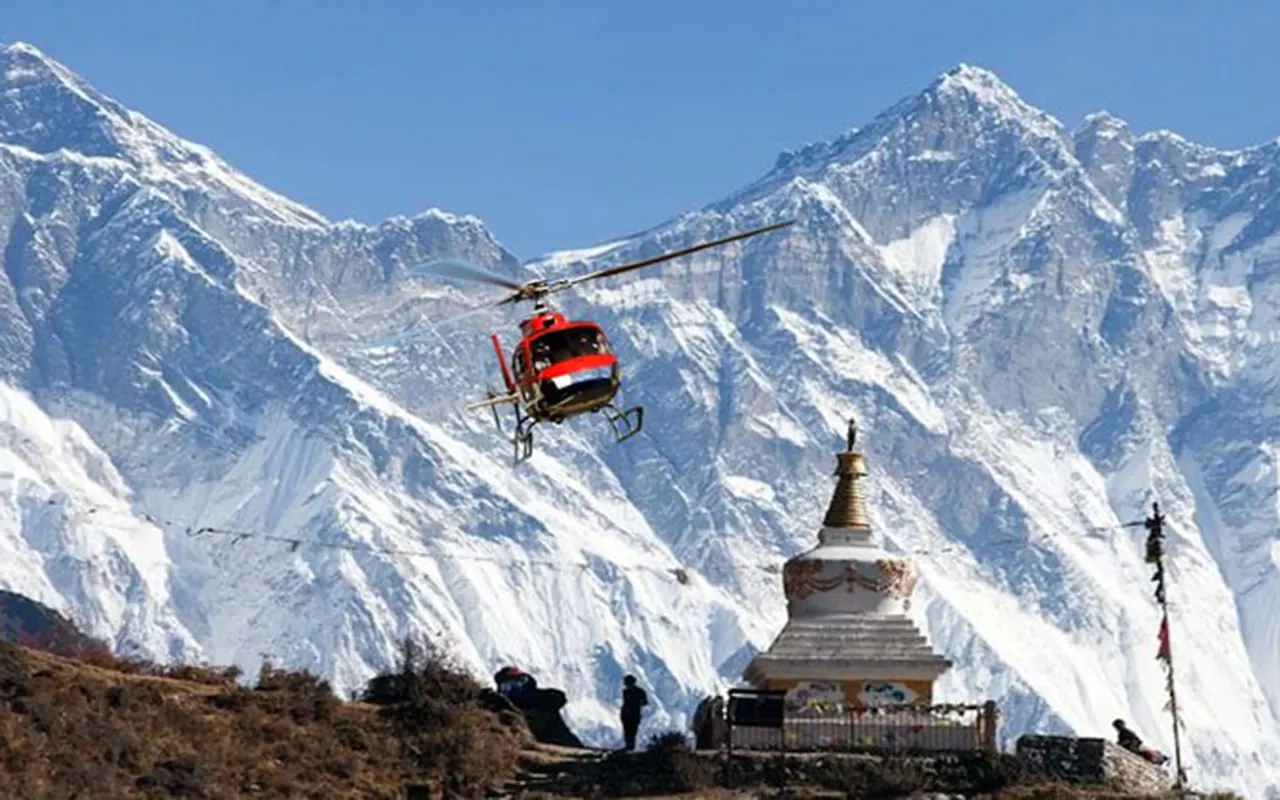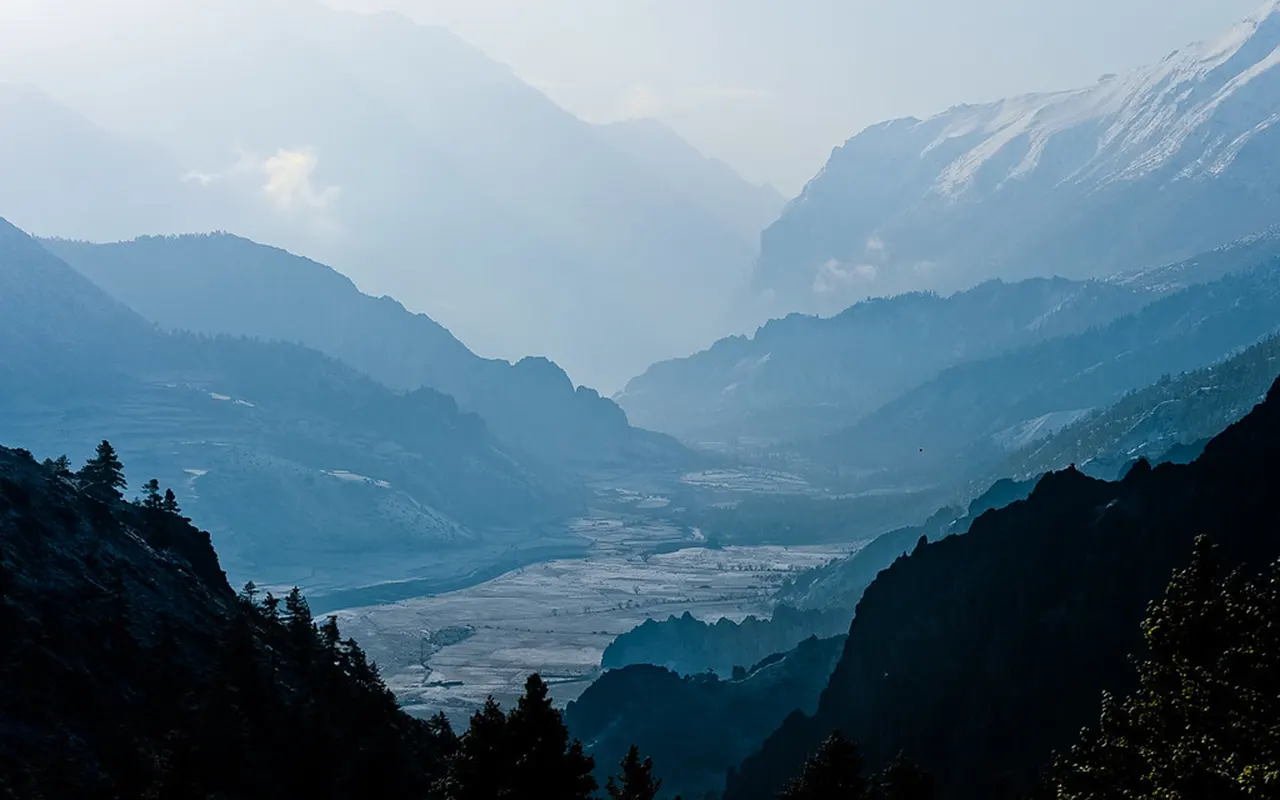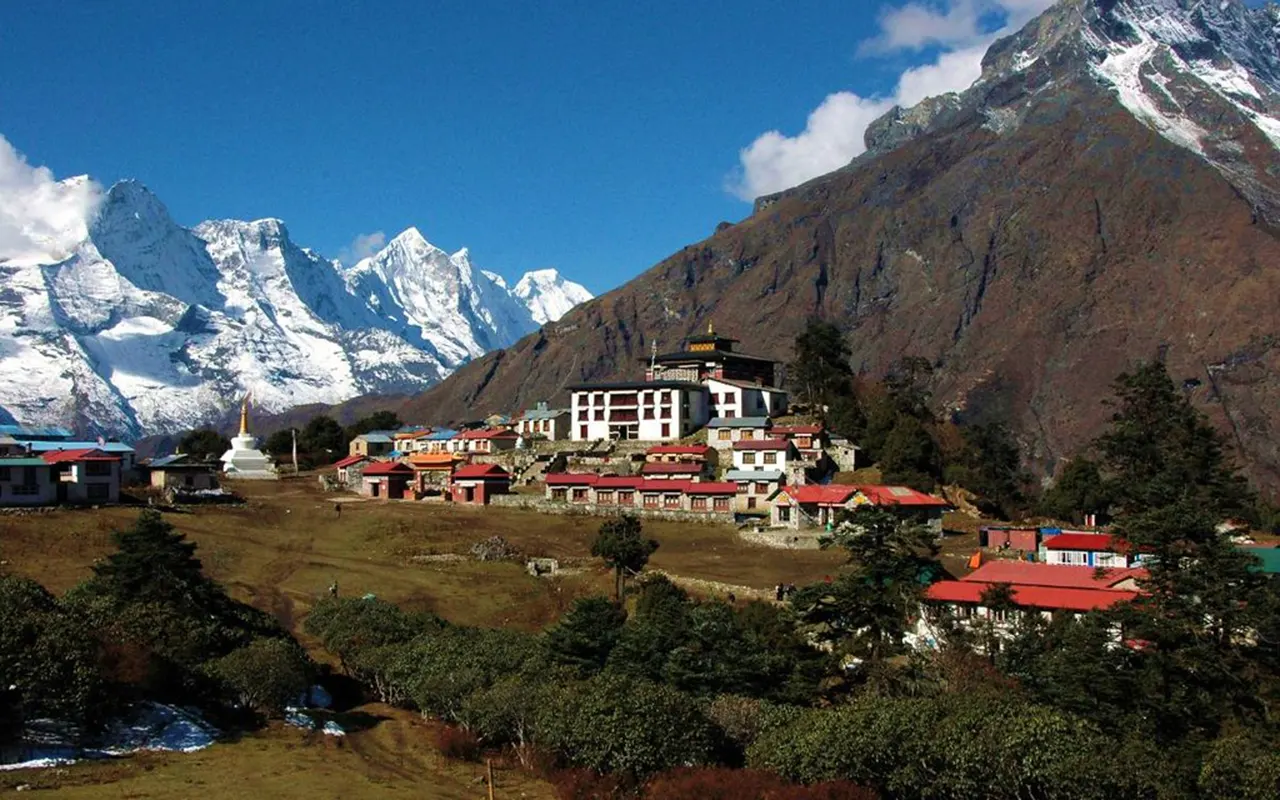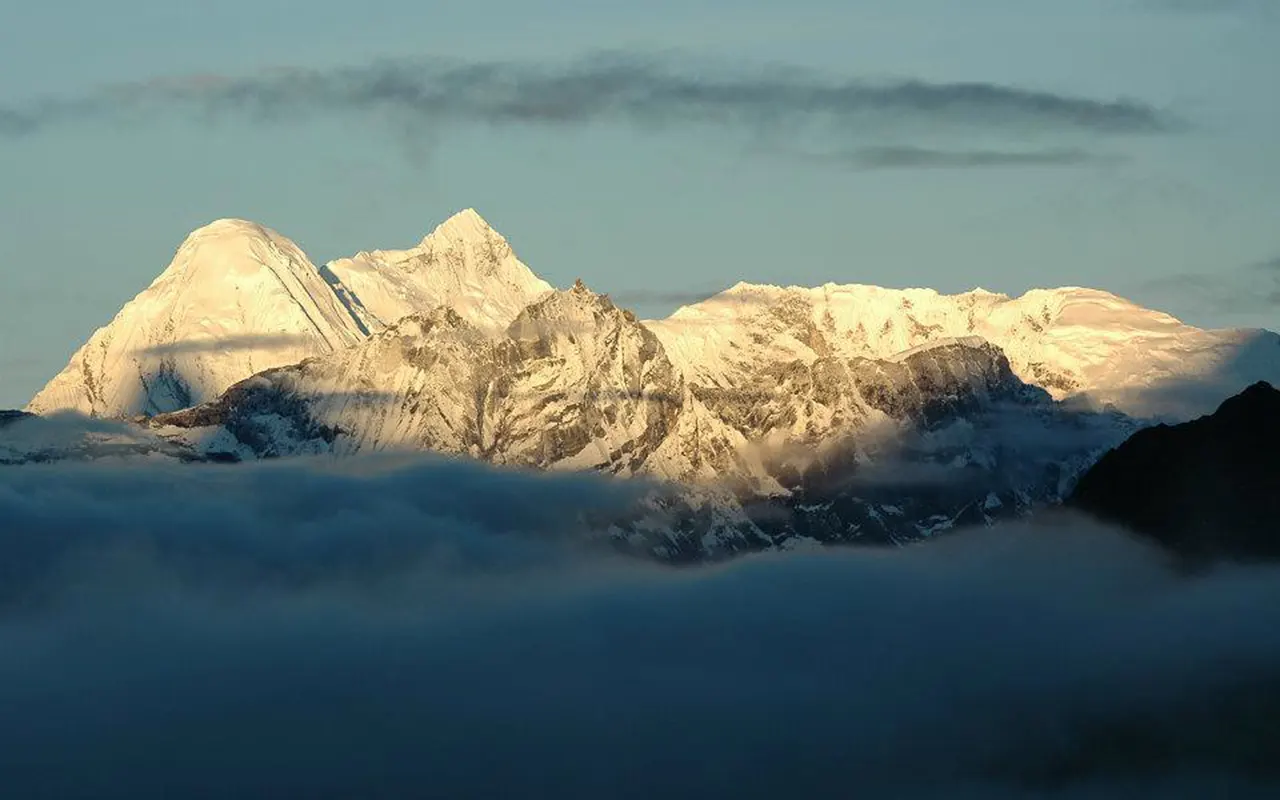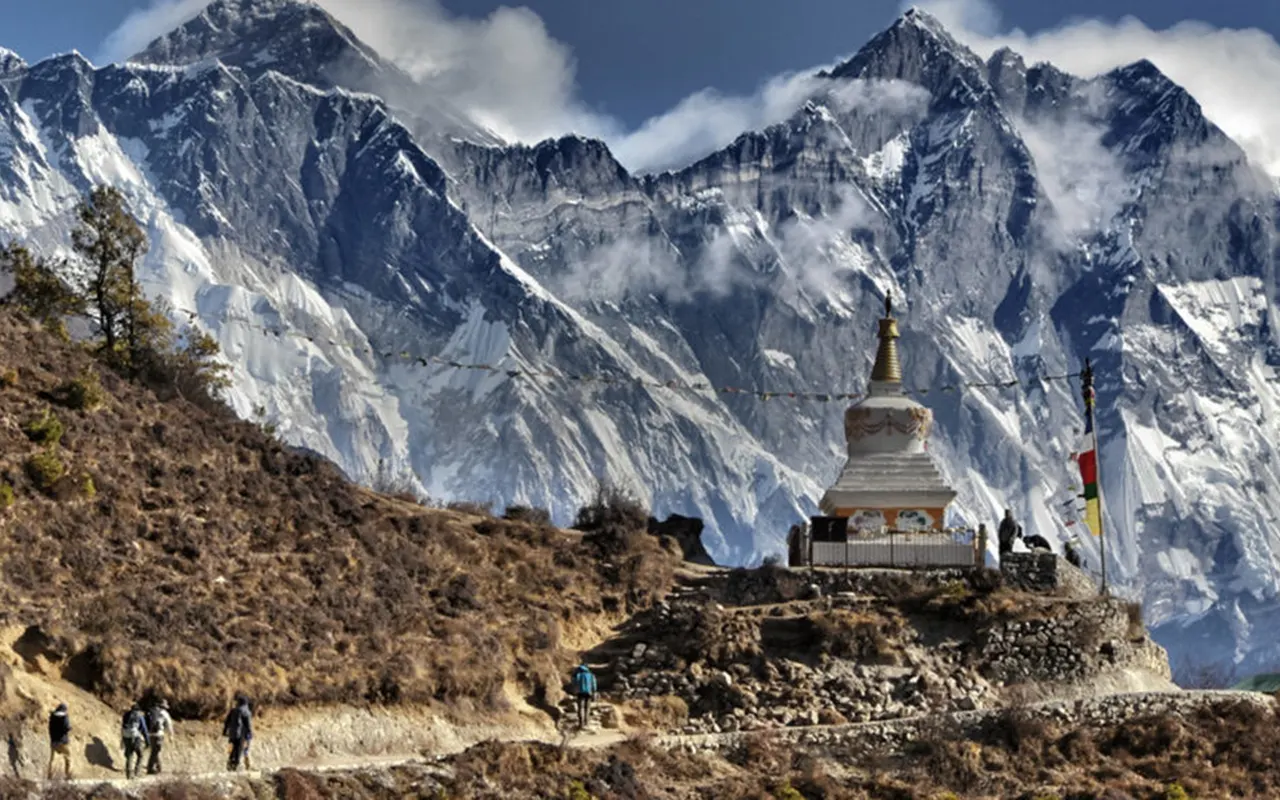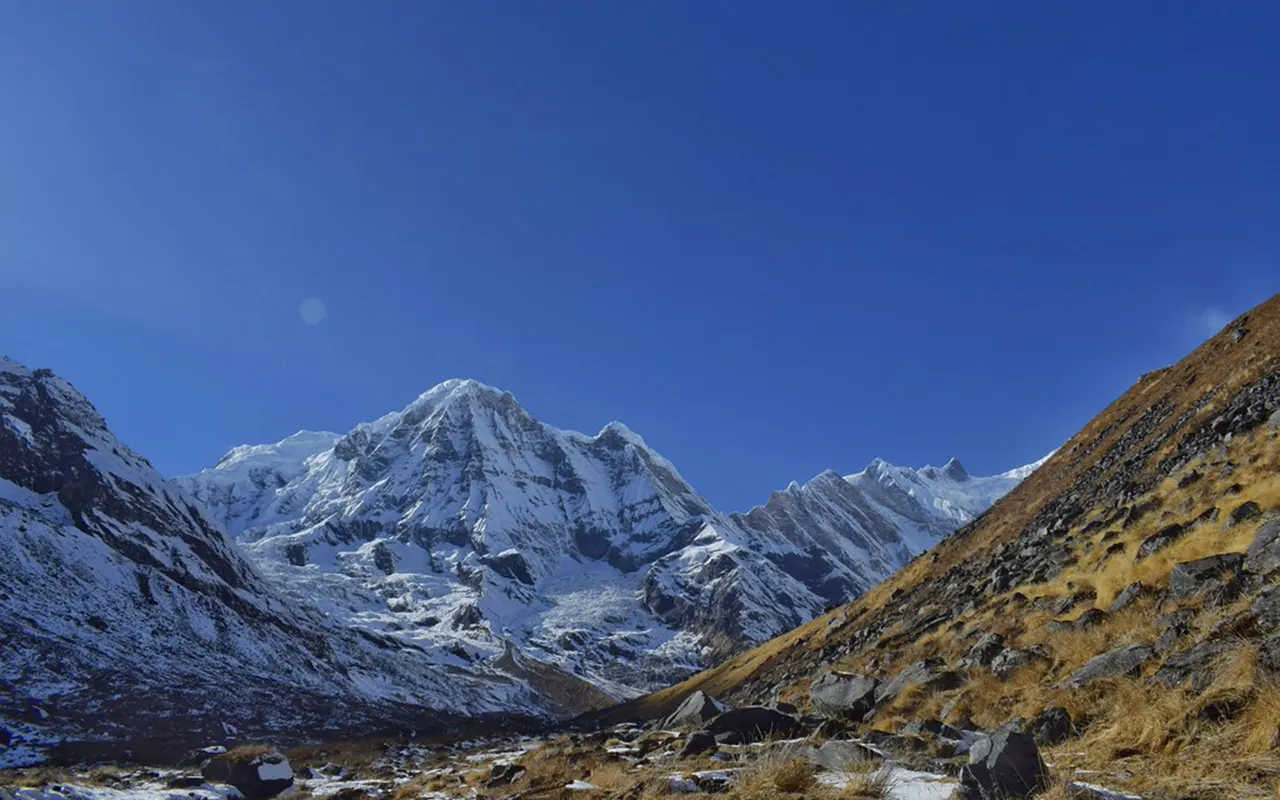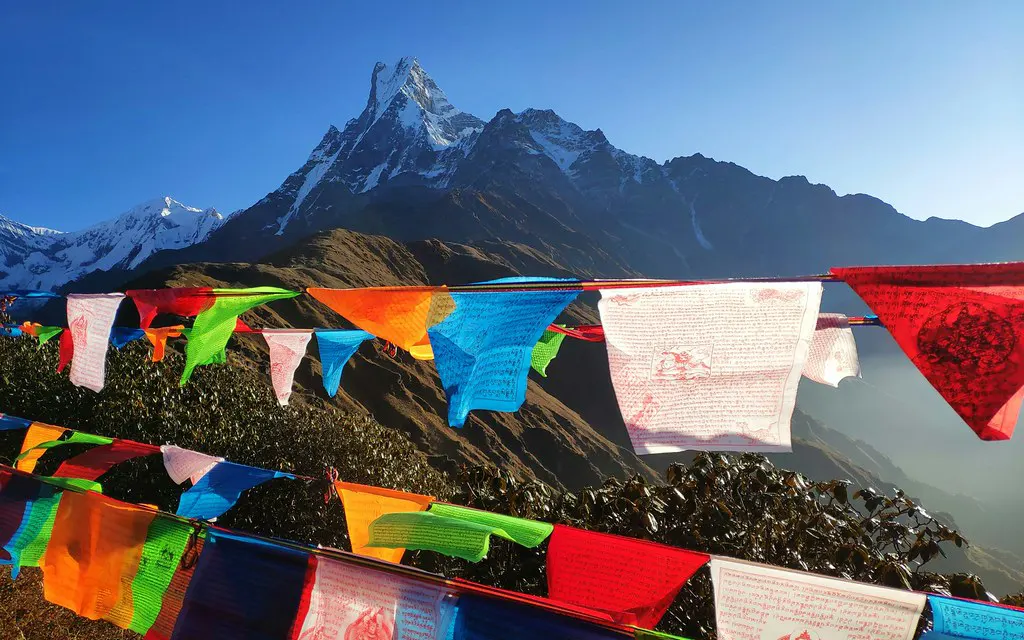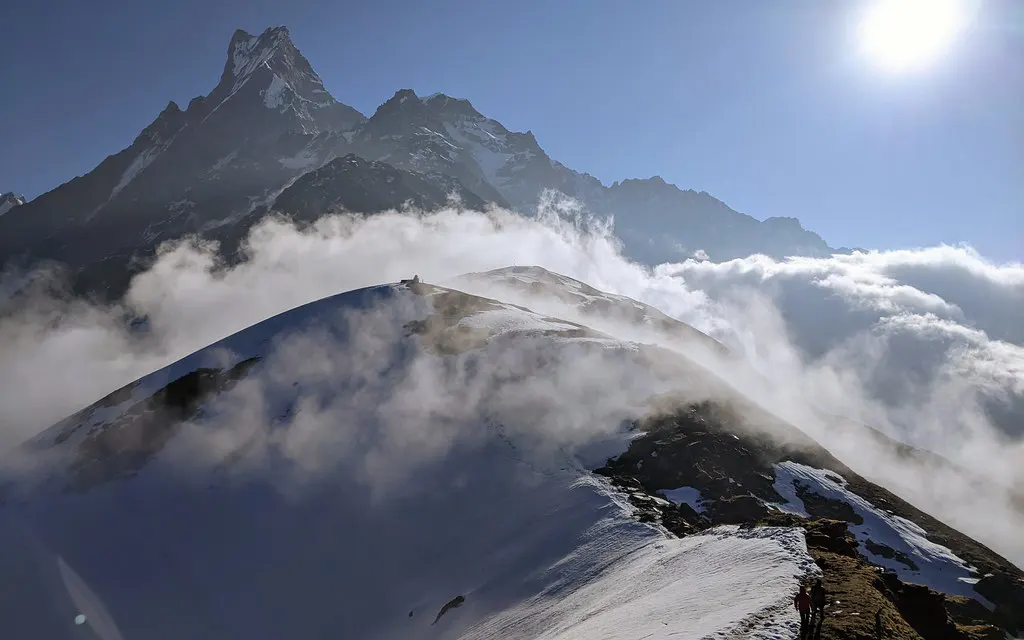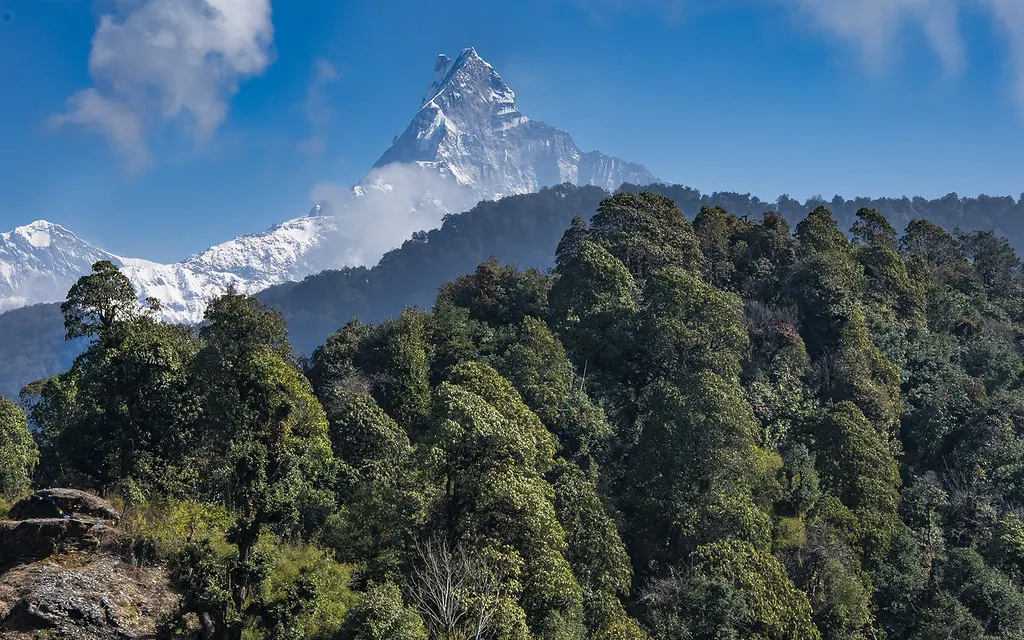
Manaslu Circuit Trek Best Time & Weather (2026)

Choosing the Best Time for the Manaslu Circuit Trek is one of the most important parts of planning your adventure in Nepal. The weather, trail safety, mountain views, and overall trekking experience vary greatly from month to month. The Manaslu region is not as crowded as other popular trekking destinations, but each season has its own charm, so it is crucial to know what to expect before planning your travel dates.

The Manaslu Circuit Trek features treks around Mount Manaslu, the 8th-highest mountain in the world at 8,163 m (26,781 ft). The trail leads through traditional mountain villages, forests, rivers, suspension bridges, and into the high-mountain landscape, then across the steep Larkya La Pass (5,106 m / 16,752 ft). Weather is a huge factor in comfort and safety when travelling at high altitude, as it is in this case.

The following is a guide to the Best Time for Manaslu Circuit Trek, detailing each season. You’ll get the facts on temperatures for your Manaslu

circuit Trek, trail conditions, visibility, crowd size and the pros and cons of trekking in the spring, summer, autumn and winter. At the end, you will be sure about which season you are looking for and the purpose of your travel.

Understanding the Climate of the Manaslu Region

Manaslu region has four seasons. As the year goes on, the weather gradually alters, making the Manaslu Circuit Trek more difficult the higher up you go. Lower villages have relatively mild weather throughout most of the year, and higher areas close to Larkya La Pass have freezing temperatures for much of the year.

Manaslu Circuit Trek
Choosing the Best Time for the Manaslu Circuit Trek is one of the most important parts of planning your adventure in Nepal. The weather, trail safety, mountain views, and overall...
duration 14 Days
difficulty Moderate

The official route of the Manasku Trek typically begins at Machha Khola, around 930m (3,051ft) and rises to pass through Jagat, Deng, Namrung, Lho, Samagaon, Samdo, Dharamsala and then crosses the Larkya La Pass before settling down into the Annapurna area.

The trail has a high elevation change and can be warm in the lower valleys and freezing in the higher camps on the same outing. The weather conditions of each season during the Manaslu Circuit trek are important to know so that you can equip yourself with the proper clothing and gear.

Spring (March to May)

Spring is undoubtedly one of the best times for the Manaslu Circuit Trek. Gradually, after winter, the temperature rises, and trekking becomes easy and comfortable without any fluctuations in mountain weather.

March starts with cool mornings and nights in the higher elevations. Spring approaches in April with snow on many sections of the trail becoming lighter and the days getting warmer. In May, the weather is warm but still good for hiking on the Manaslu Circuit Trek before the summer monsoon starts.

One of the highlights of spring during the Manaslu Circuit Trek is the blooming rhododendron forests. The lower and middle parts of the trail are joined by hillsides of colourful red, pink and white flowers that provide beautiful scenery. The forests then turn green again, and the rivers are strong due to melting snow.
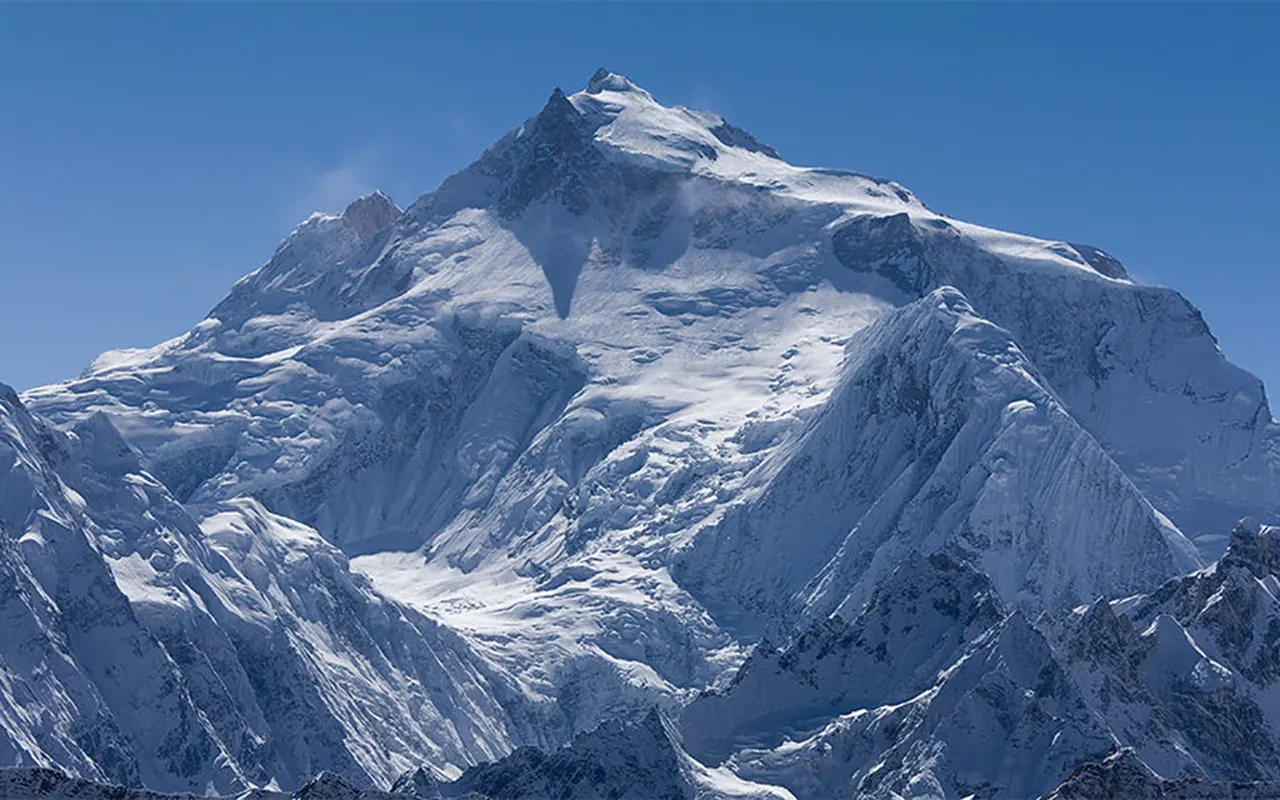
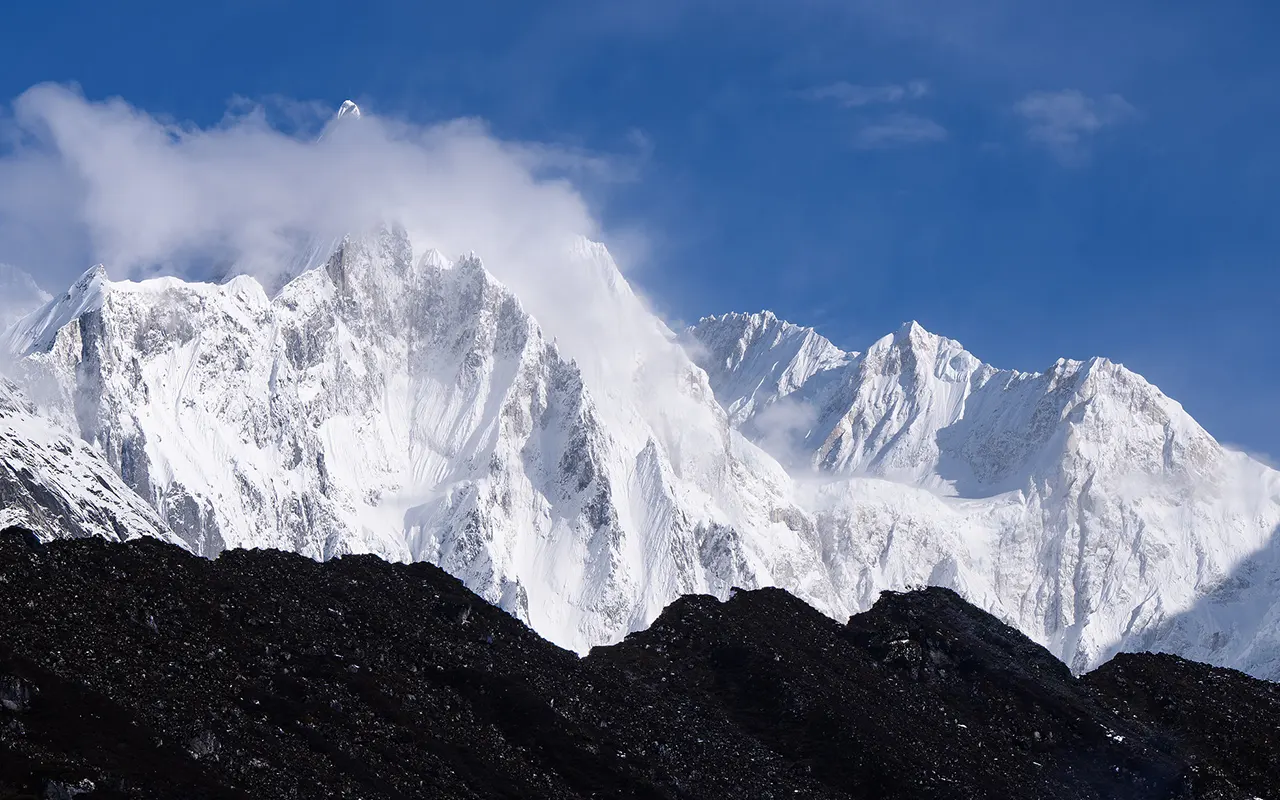
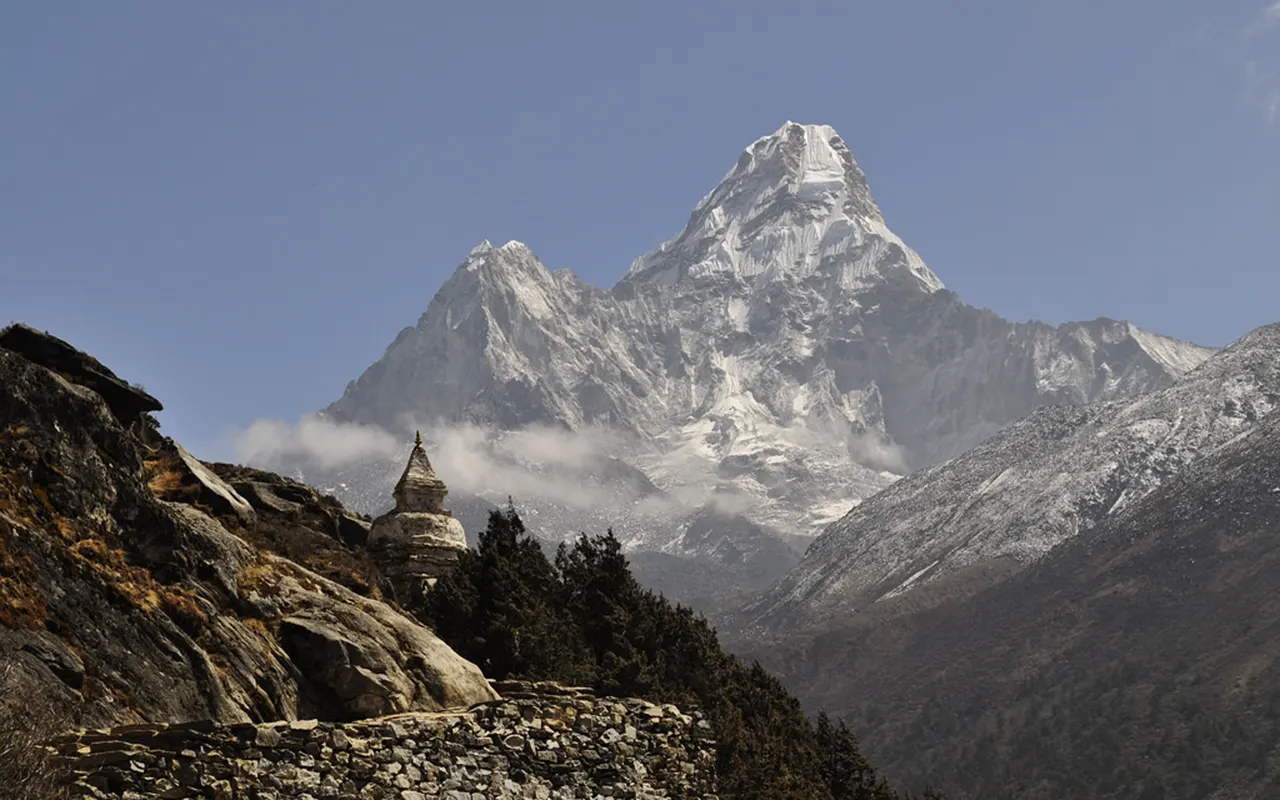
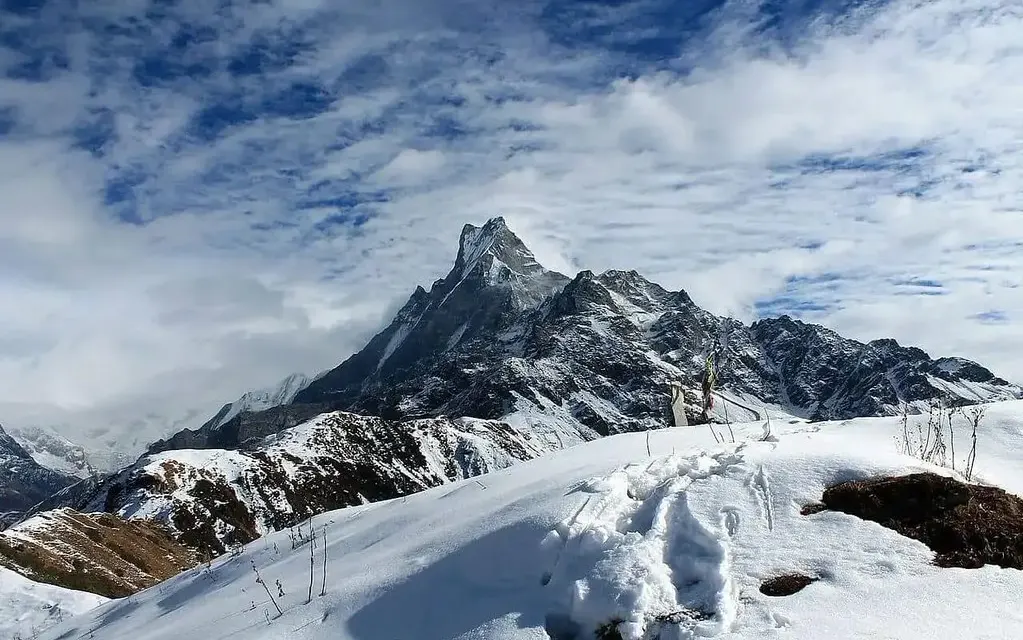
Manaslu Circuit Trek Peak

In the spring months, visibility is generally good, especially in the morning in the mountains. The skies are clear and offer great views of Mount Manaslu, Himalchuli, Ngadi Chuli, Ganesh Himal and other surrounding peaks. Clouds may form in the afternoon; this does not affect the overall Manaslu Circuit Trek

The temperature during the day in the lower villages is generally between 15°C and 22°C and nights are cool. Temperatures become much colder around Samagaon at about 3530 m (11581 ft) and at night. At Larkya La Pass (5106 m /16752 ft), temperatures are frequently sub-freezing in early mornings.

Ganesh Himal Trek 14 Days
Choosing the Best Time for the Manaslu Circuit Trek is one of the most important parts of planning your adventure in Nepal. The weather, trail safety, mountain views, and overall...
duration 14 Days
difficulty Moderate

“Spring is also one of the busiest seasons for the Manaslu Circuit Trek, even though it is less crowded than the Everest and Annapurna Circuit Treks. There are normally no problems with tea houses, and there is always plenty of accommodation.

Summer or Monsoon (June to August)

Nepal is experiencing monsoon season during the summer. The rainy season is the least favourable time to go for the Manaslu Circuit Trek due to heavy rainfall (except for much of the region). June is typically when it rains, followed by July and August. The trail becomes muddy and slippery in some areas and rivers are flooded by rain in many places. The autumns are stronger and more beautiful, posing more difficulty to the trekkers but also adding to the beauty of the landscape.

The mountains are often obscured by the clouds. Sometimes conditions are clear in the mornings, but not always. The rain is also constant, which increases the humidity and makes walking harder.

Another difficulty with this season is that of leeches below about 2,500 m (8,202 ft) in forested places. However, they are not dangerous, but for many trekkers, they can be an uncomfortable occurrence.

There are some things to be said for summer, however. The forests are very verdant, the agricultural fields are alive and the paths are considerably quieter. Trekkers looking for solitude may appreciate this peaceful atmosphere.

But, in the event of heavy rains, landslides and damage to trails are possible. The road up to the starting point may be temporarily blocked as well. The trekkers should take note of the latest Manaslu Circuit Trek weather forecast before going for the trek during this period.

Autumn (September to November)

Autumn is considered to be the Best Time for the Manaslu Circuit trek as the weather is relatively stable, the mountain visibility is high and the climatic conditions are comfortable.

In early September, the monsoon is over, and the rain starts to diminish; the air becomes fresh and clean. By late September and into October, skies are typically clear with some of the best mountain views for the year!

October is a favourite month for walking due to the favourable weather conditions and good visibility throughout the month. Snow-capped peaks are sharp against the deep blue skies, and photography is a rewarding activity.

November is a great date, too. It remains dry with temperatures starting to drop at higher elevations in the morning and evening.

The path is livelier in the Autumn. Trekkers come from all over the world to tea houses; they are vibrant but not congested. The Manaslu region, however, does require special trekking permits and registered guides, which means that the number of visitors is still less than on other popular trekking routes in Nepal.

Lower villages have average temperatures of 15 to 20 C during the daytime, while at Samdo (3875 m or 12713 ft), mornings are much colder. Temperatures below freezing are often experienced before sunrise near Larkya La Pass (5106 m/16752 ft).

Autumn is the best season to do the Manaslu Circuit Trek as it provides the most favourable weather, dry trails and spectacular views.

Winter (December to February)

The Manaslu area becomes a silent, snow-clad mountain during the winter season. Trekking is still possible, but the conditions are much more difficult.

The first week of December is typically sunny and dry. January is a cold month with the temperature plummeting much below normal, especially above 3,500 m (11,483 ft). Heavy snow in autumn may temporarily close Larkya La Pass and crossing it safely, it may be difficult or impossible.

Winter is the trickiest time of the year in terms of the weather. Beware of freezing temperatures even during the day near higher camps. The nights in Dharamsala, which stand at about 4460 m (14633 ft), are very cold.

Winter challenges notwithstanding, for experienced trekkers, there are still quiet, lovely trails to be had and a scenic view blanketed in snow. Mountain views are generally very clear, since there is little moisture in the air.

In the colder months, some of the tea houses in the higher villages may close because of fewer visitors. Trekkers should make advance arrangements for accommodation for their winter trekking.

During winter, appropriate attire, insulated boots, warm sleeping bags and planning become critical. It is important to know what to expect in terms of weather conditions when planning a Manaslu Circuit Trek for winter trekking.

Comparing the Four Seasons

A different trekking experience is offered every season. Spring brings color to the forests, warm weather and blooming flowers. Autumn is the best time of year and offers the best weather. Winter offers restful trails and snow-covered scenery with a higher level of preparation. Summer is a beautiful season, but it also comes with rain, slippery trails and a lack of mountain views.

The spring and autumn seasons continue to be the most popular times of year for the Manaslu Circuit Trek, offering the best conditions for both weather and trail conditions and safety.

Temperature Differences by Elevation

The temperature varies significantly with altitude on the Manaslu Circuit Trek. The higher villages are much cooler in the daytime and the lower villages are relatively warm.

The daytime temperature is pleasant in spring and autumn at Machha Khola, approximately 930 m (3,051 ft). The morning temperature turns colder at Namrung, around 2,630 m (8,629 ft) and warm clothes are required.

The nights during most of the Manaslu Circuit Trek seasons are cold at Samagaon (3,530 m /11,581 ft). Even in the autumn, Dharamsala (4,460 m /14,633 ft) is cold, and temperatures near Larkya La Pass at 5,106 m (16,752 ft) are frequently below freezing.

The changes in weather and climate are why it is suggested to wear layered clothing irrespective of the season when it is decided to take the Best Time for the Manaslu Circuit Trek.

How Weather Affects Larkya La Pass Crossing

The Larkya La Pass is the most challenging part of the Manaslu Circuit Trek. The weather here can have a direct impact on safety and success.

Crossing can be much more challenging due to strong winds, snow, autumn and ice. Most tours during spring or autumn start before dawn, when the air is still, which is a good time to trek.

The pass can be closed for a few days in the winter if there is heavy snow. In the monsoons, visibility can be low due to cloud cover and sometimes snow in higher elevations.

The selection of good weather considerably improves the safety of crossing the pass, so it is also a significant part of planning the Best Time for the Manaslu Circuit Trek for the season.

Choosing the Right Season for Your Travel Style

It is largely a matter of personal preference as to the best time to trek, as the season of the year can have a significant impact on what is offered.

Spring is a great time if you like to see flowers in the woods, moderate temperatures and colorful scenery. Autumn is hard to beat when you’re looking for weather and crystal-clear views of the mountains.
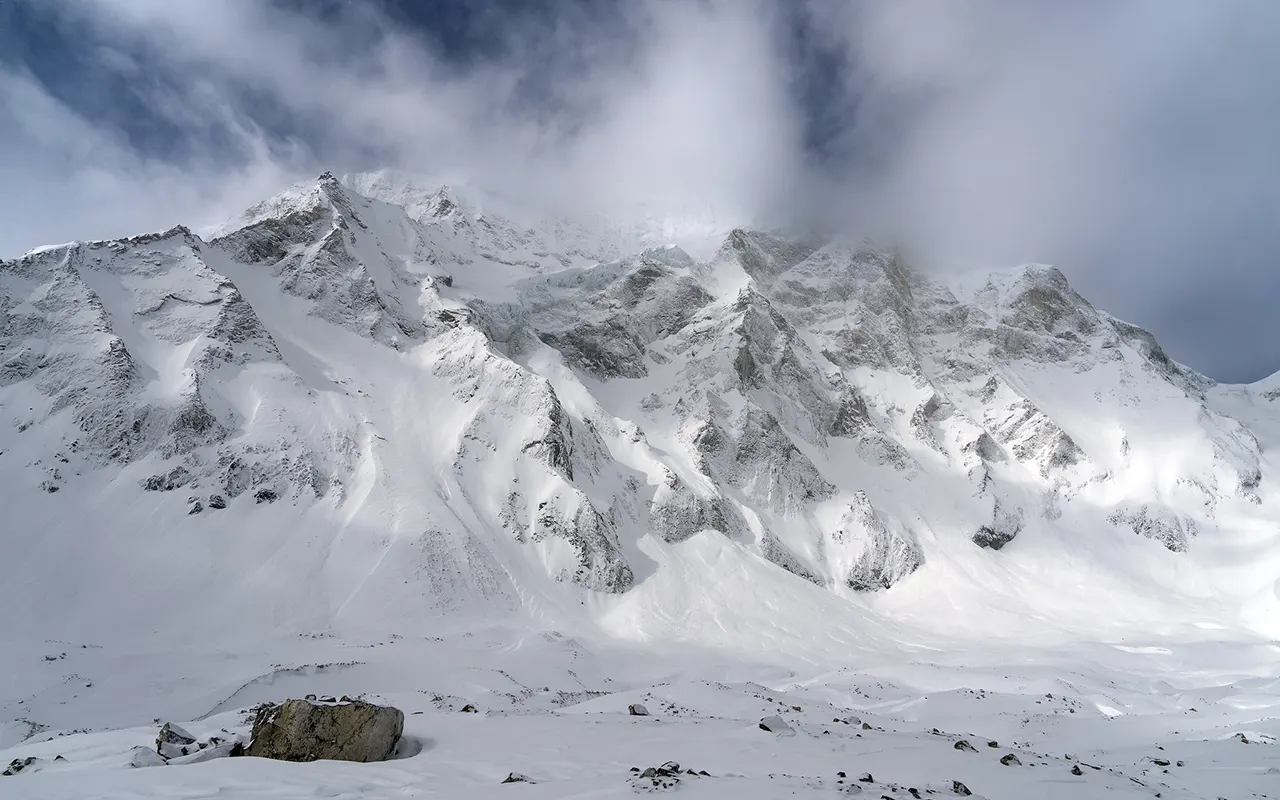
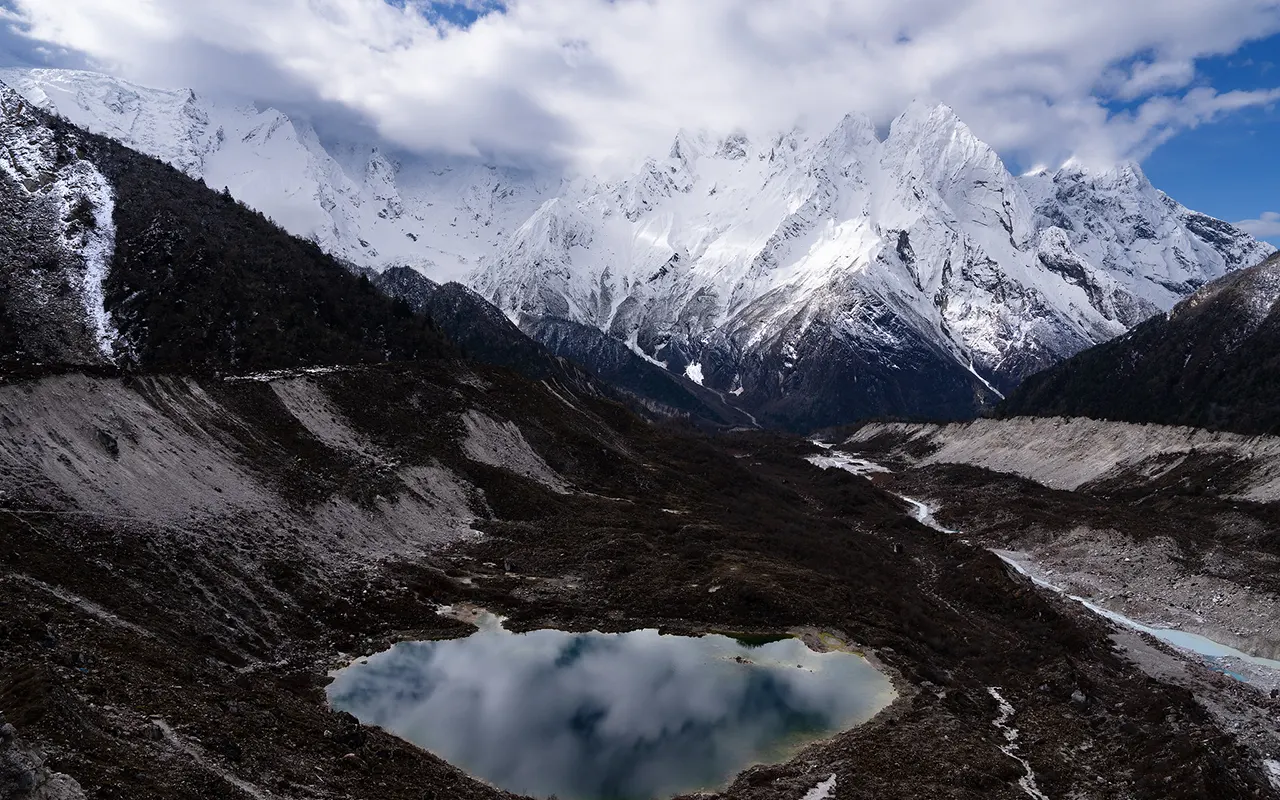
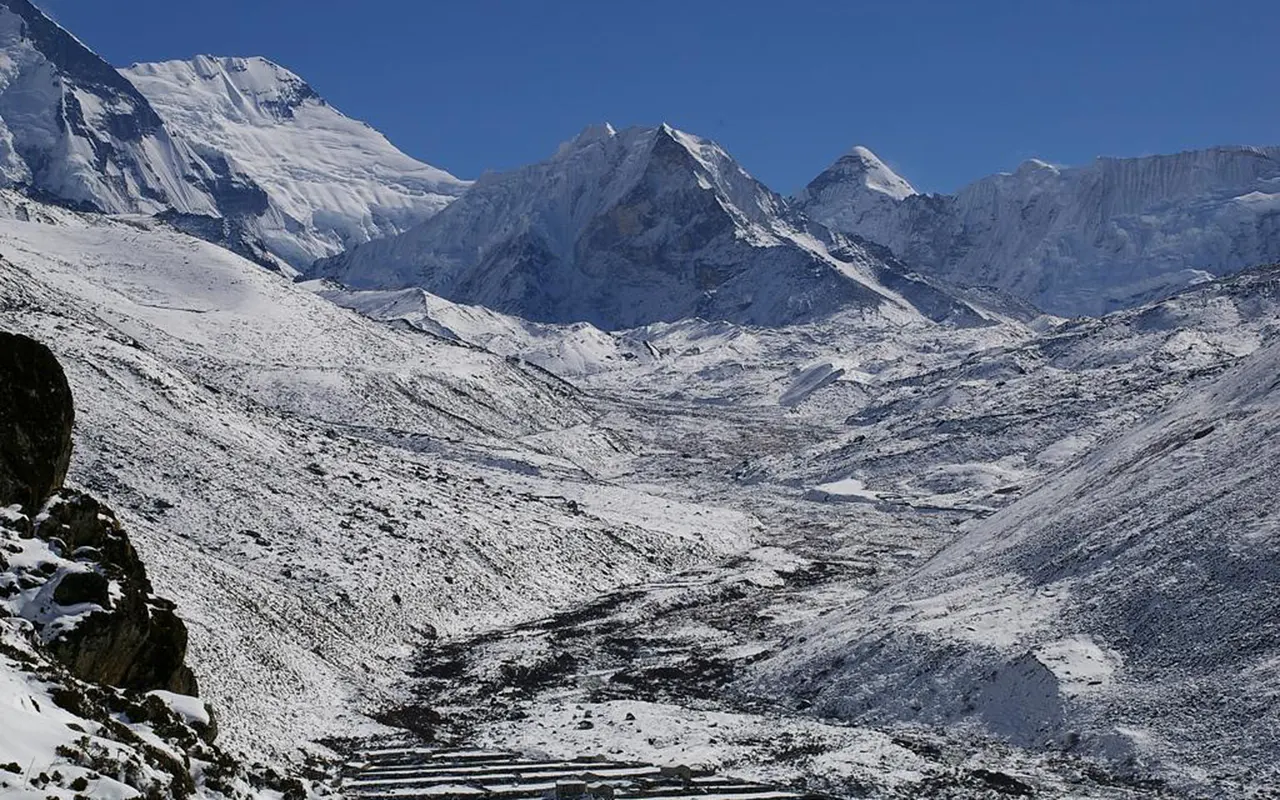
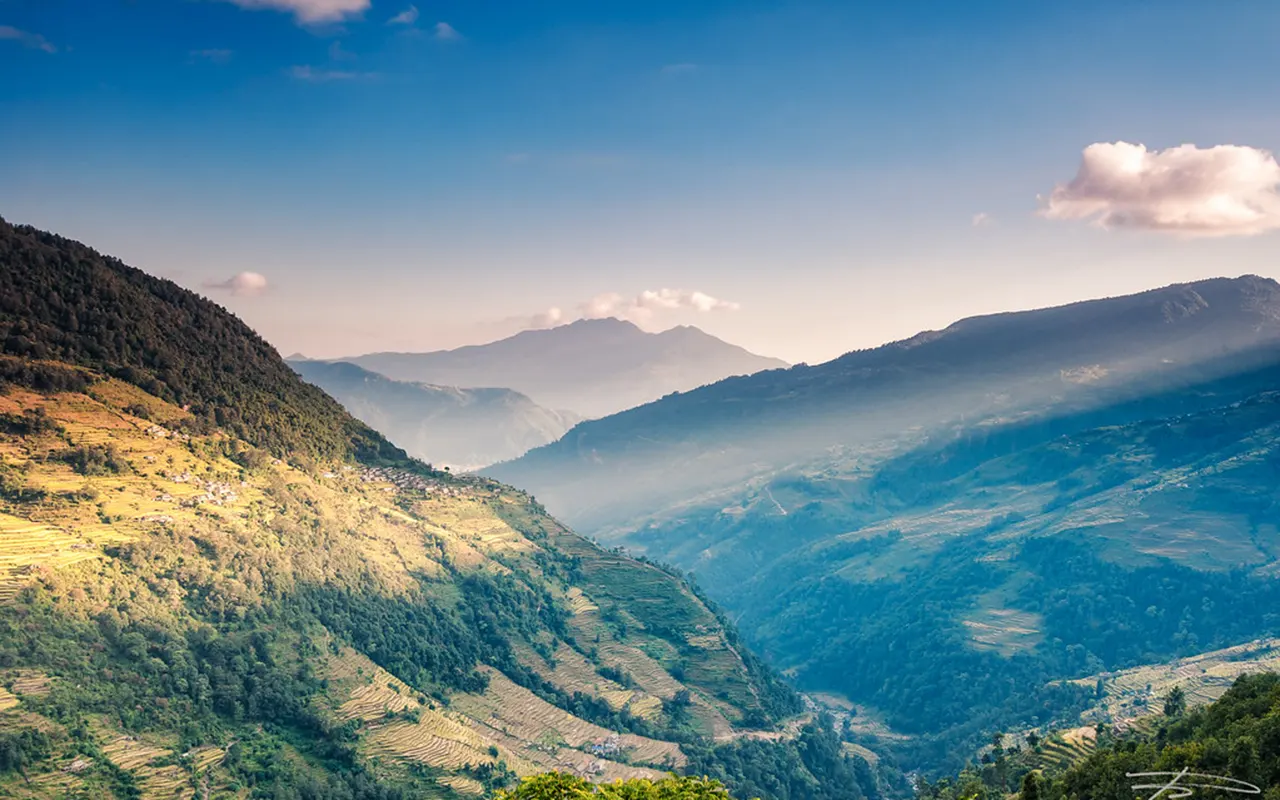
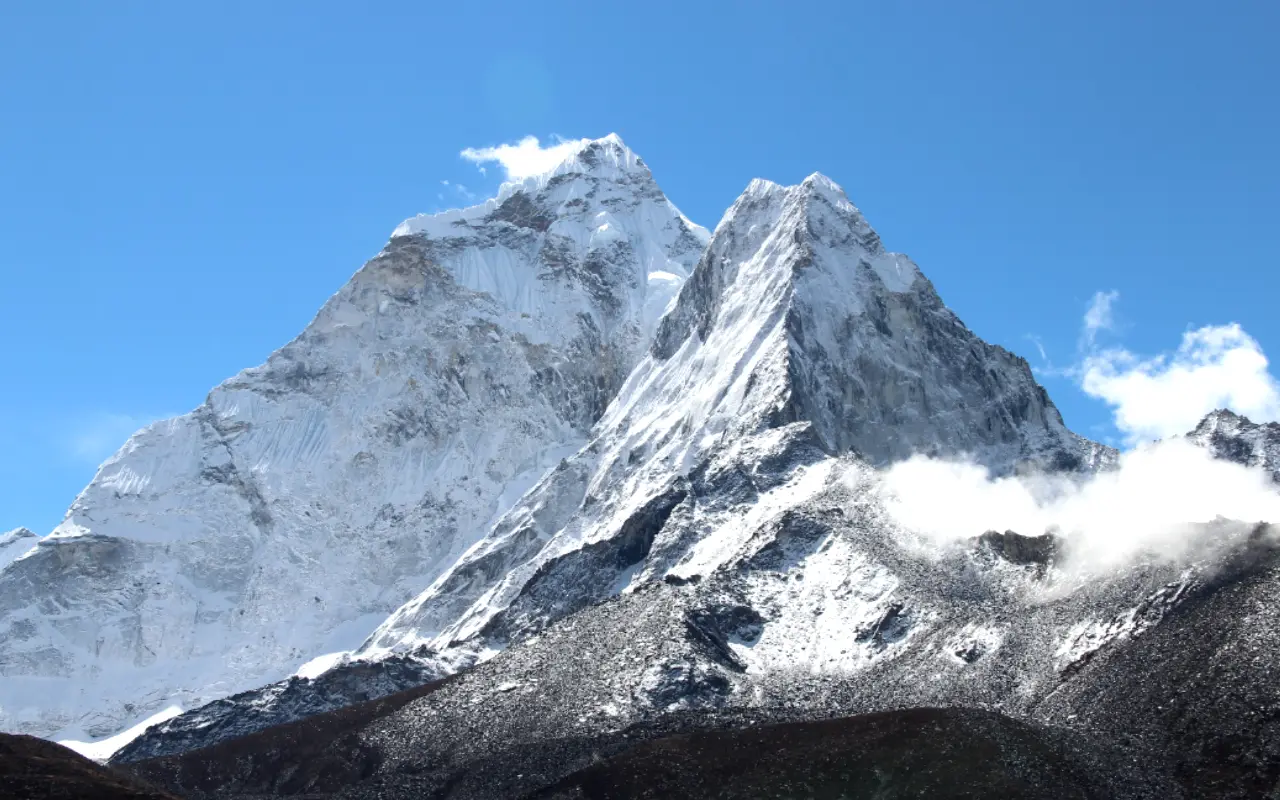
Manaslu Trek View

Winter could be preferable for trekkers who want to trek and enjoy snow if they have the right skills and gear. For those seeking the greenest of landscapes and less foot traffic, it’s still a season for the monsoon.

The differences between the seasons of the Manaslu Circuit Trek can help you plan your trip in line with your interests and not just in the most popular months.

Conclusion

The best time for the Manaslu Circuit trek depends on what you’re looking for, your experience and your weather preferences. The best time to travel is spring (March to May) and autumn (September to November), when the weather is relatively mild, the trails are safe to travel, the skies are clear and the mountains are spectacular.

Manaslu Circuit Tsum Valley Trek
Choosing the Best Time for the Manaslu Circuit Trek is one of the most important parts of planning your adventure in Nepal. The weather, trail safety, mountain views, and overall...
duration 18 Days
difficulty Difficult

US$ 1350

For experienced trekkers, winter is still a good time to do so, though they need to be prepared for cold weather and the possibility of snow; and summer is mostly recommended for only trekkers who are comfortable in the monsoons.

Regardless of the travel time, you will be able to enjoy this amazing Himalayan trip if you are well-prepared, wear the appropriate clothing and are flexible with the weather. If you can take advantage of the seasonal variations, you can go into the Manaslu Circuit Trek in a manner that will let you get the best of it while remaining safe and comfortable during the entire trip.
Everest Base Camp Trek with Helicopter Return vs Standard EBC Trek: Which Is Better?

One of the most important choices you have to make when you’re planning your trip to the Everest region is deciding between the Everest Base Camp Trek with Helicopter Return and the traditional trek. Both options will get you to Everest Base Camp, where you can get a taste of Sherpa culture and also experience some of the most memorable scenery in the Himalayas. The return trip is quite different, though and thus alters the overall trekking experience.

Some people choose to walk the whole way back to Kathmandu from this point; others opt to fly back to Kathmandu from Kala Patthar and Everest Base Camp. Every choice offers its benefits based on the amount of time, money, fitness and travel you have.

This guide provides an in-depth comparison of the two types of trekking. You will be informed of the tour schedule, trekking experience, physical challenges, cost, safety, scenery and who the trek is suitable for. By the end, you’ll know which is the best fit for your needs.

Understanding the Two Trek Options

Everest Base Camp Trek with Helicopter Return is a popular trail from Lukla to Everest Base Camp. Trekkers trek through popular villages of Phakding, Namche Bazaar, Tengboche, Dingboche, Lobuche and Gorakshep before heading to Everest Base Camp. The majority of tours also feature a morning hike to Kala Patthar  5,545 m (18,192 ft), the highest viewpoint of the Everest Base Camp Trek, for a breathtaking panoramic view of Mount Everest.

Trip not found.

Travellers do not have to trek back to Lukla over several days but instead can take a helicopter from Gorakshep or another landing site to fly straight to Lukla or Kathmandu. The helicopter flight offers a bird’s-eye perspective of glaciers, valleys, mountains and remote Himalayan villages and also cuts down on the return trip.

The Standard Everest Base Camp Trek follows the same route to Everest Base Camp and Kala Patthar. The main difference is that it takes another 3-4 days to walk back to Lukla, and it is usually a different trekker who does this – the one who flies to Kathmandu.

Both of these treks follow the same route, but the overall experience is different due to the manner in which the return journey is undertaken.

Route and Itinerary Comparison

Both treks are similar in the initial section. The path from Lukla (2860m) slowly rises through the woods, Suspension bridges and traditional Sherpa villages. There are usually acclimatisation days spent in Namche Bazar and Dingboche to minimise the possibilities of altitude sickness.

Following this trekker heads on towards Lobuche and Gorakshep and then onwards to Everest Base Camp at 5364m (17598ft). Most treks will also go through Kala Patthar, which offers one of the best close-up views of Mount Everest.

With the EBC Helicopter Return Trek, the trekking ends after Kala Patthar. Then a helicopter is flown over the Khumbu glacier and surrounding peaks back to Kathmandu or Lukla.

The latter route of the Standard Everest Base Camp Trek is the same trek that goes back through Pheriche, Namche Bazaar and Lukla. The return is on the same routes, but many of the hikers remark on the change in the mountain views, the weather and the easy-going nature of the route due to the majority being downhill.

Trekking Experience

The entire hike experience is different according to the way you return.

Everest Base Camp Trek with Helicopter Return is an adventure yet comfortable trek. You still hike down to Everest Base Camp, but without the long walk down. Many hikers enjoy the challenge of completing the trek and then taking a helicopter ride over the Himalayas. The Khumbu Icefall, glaciers, rivers and mountain ridges are a different experience when viewed from the air.

The Standard Everest Base Camp Trek provides a more realistic feeling of making the full trek on foot. Many of the more seasoned trekkers love to walk the full route, even the return leg! The additional days spent in the mountain villages offer additional chances to meet the local population and experience tea houses and mountain life in the Everest area.

Both experiences are not suited to all. Depending on your preference, you can either do the whole segment or you’ll want to consider a helicopter ride for a memorable touch.

Time Required

Oftentimes, the time factor is the one that makes the difference.

The typical duration of the Everest Base Camp Trek with Helicopter return is between 10 and 12 days. The trek round-trip is several days if the walk back is done, so for those who have limited vacations, this is a very practical choice.

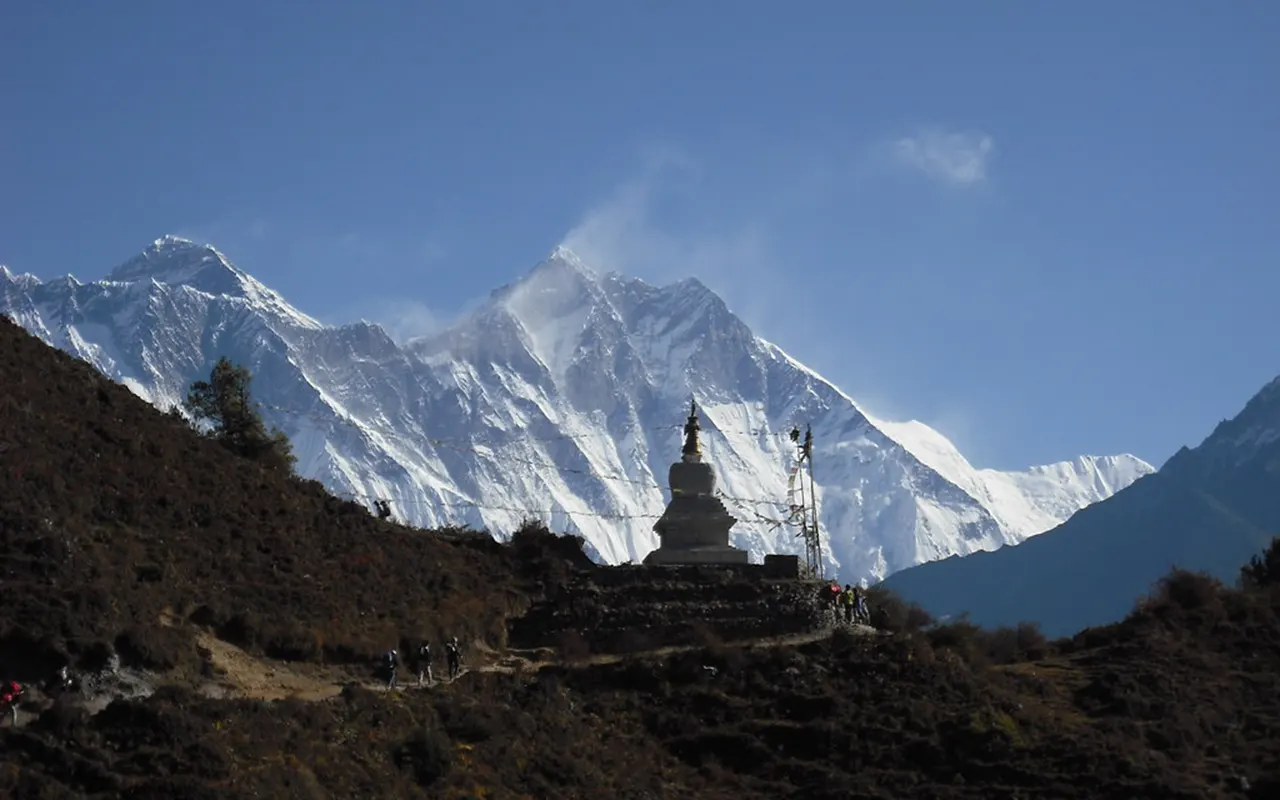
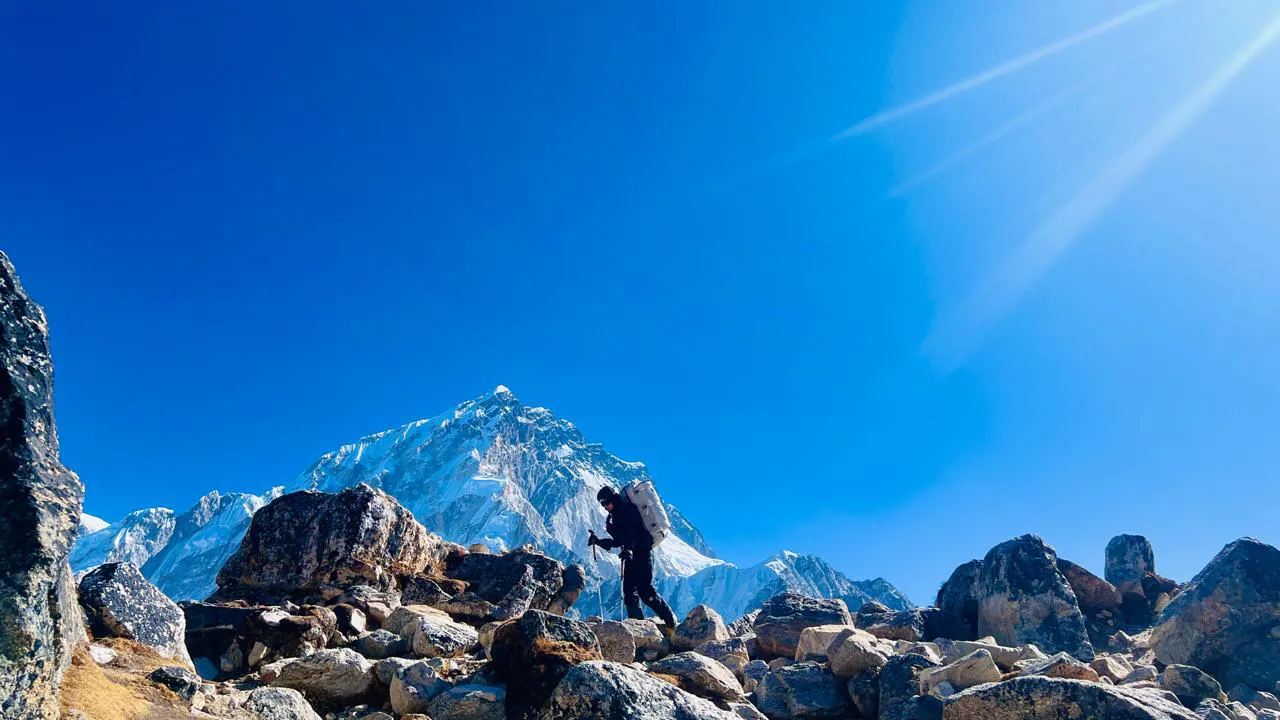
Base Camp Trek View


Typically, the Standard Everest Base Camp Trek takes 12-14 days, varying with trek routes and weather. The extra days are to be spent coming back from EBC to Lukla.

For those who have a busy itinerary but still wish to visit Everest Base Camp, a helicopter ascent and descent may be a great option.

Physical Difficulty

Either of the two treks is physically demanding since one must trek for several days to the Everest Base Camp at high altitudes.

Both routes to Everest Base Camp involve the same ascent. Trails are rocky, steep and hilly in many places, and trekkers walk most of the day as they slowly rise in altitude.

The difference comes after reaching the destination.

This Everest Base Camp Trek with Helicopter Return eliminates days of descending back to Kathmandu. Although it sounds easier, long, downhill walks can put a strain on the knees, ankles and leg muscles. These are intense days for many trekkers.

The Standard Everest Base Camp Trek is a trek that demands a lot of stamina to walk up and down. The general rule for the return is that it is easier since the altitude is lower, but it still requires stamina.

The helicopter return might be more suitable for those who have experienced knee pain in the past, don’t have a lot of time or don’t want to trek that distance.

Cost Comparison

When deciding between these two treks, cost is another important consideration.

The Standard Everest Base Camp trek has a lower cost, unless you need to use a helicopter, which is one of the most expensive options. The bulk of the package price is for accommodation, meals, guide services, permits and domestic flights.

Helicopter return to Everest Base Camp is much more costly because of the helicopter ride. The cost can fluctuate with the weather, number of persons and shared or chartered helicopter.

The helicopter ride is usually more expensive, but many people feel the shortened trip, less leg work and the air view of the mountain are worth the price.

Scenic Experience

Both hikes offer great views along the way.

Suspension bridges, monasteries, snowy peaks, mountain villages, rivers and forests meet as you walk through Sagarmatha National Park. Close-ups of Ama Dablam, Lhotse, Nuptse, Thamserku and other Himalayan mountains are enjoyed by the trekkers.

Combined with this is the EBC Helicopter Return Trek with its aerial views of the Khumbu Glacier, the deep valleys and the mountain ranges. From above, one can see landscapes which are not fully appreciated from the trekking trail.

The Standard Everest Base Camp Trek gives more opportunities to appreciate the variations of light, mountain sunsets and quiet mornings in the villages. Some trekkers like to stay a few more days in the Himalayan environment and don’t want to hurry to return to the base of the mountain as soon as they get to the summit.

Altitude and Acclimatisation

The two treks are alike except for the acclimatisation procedure that takes place before arriving in EBC.

The most common itineraries have rest days at Namche Bazaar (3,440 m /11,286 ft) and Dingboche ( 4,410 m /14,469 ft). The acclimatisation days are significant because they assist the body in adjusting to the growing altitude.

Everest Base Camp sits at an elevation of 5,364 m (17,598 ft), while Kala Patthar reaches 5,545 m (18,192 ft). No matter which route you take to return, the risk of altitude sickness exists; proper acclimatisation is a must.

The helicopter return does not require a slow ascent to EBC, since the ascent to EBC is the same as the ascent to the helicopter landing point.

Comfort and Convenience

There are differences in comfort levels, primarily when heading back.

The Everest Base Camp trek with helicopter return is a trek that allows the hiker to skip a few days of the trek back. This will lower physical fatigue and allow more time to rest after the hard climb.

Everest Base Camp Trek 12 Days
One of the most important choices you have to make when you’re planning your trip to the Everest region is deciding between the Everest Base Camp Trek with Helicopter Return...
duration 12 Days
difficulty Difficult

US$ 1300

The helicopter flight also helps in getting rid of the fear of walking back if minor injuries occur or people feel tired after reaching the Everest Base Camp.

The Standard Everest Base Camp Trek provides a slower pace and additional opportunities to enjoy village life. The local tea houses are a place where many trekkers become familiar, and more time is spent in the Khumbu region before heading back home.

Weather Considerations

Trekking is influenced by weather conditions in both cases.

It may be possible to see delays in flights departing from Kathmandu to Lukla due to visibility problems during the monsoon and winter seasons. Helicopter flights may also fly when flights by small aircraft cannot, but severe weather also affects helicopter flights.

Spring (March to May) and Autumn (September to November) are the best times for trekking. These months are typically sunnier and have more settled weather with better mountain visibility.

It is important to have a flexible timetable for the Everest Base Camp Trek with Helicopter Return as there are chances for a delay in helicopter flights due to weather conditions.

Who Should Choose the Everest Base Camp Trek with Helicopter Return?

Everest Base Camp Trek with Helicopter Return is a great package for those who are short on vacation time and wish to attain Everest Base Camp. This is also ideal for those who wish to decrease the amount of physical exertion for the return trip, but not sacrifice the important aspects of the walk.

This is attractive to older travellers, those seeking aerial mountain views, couples celebrating special occasions and anyone who desires a more comfortable finish.

This trek is also popular among those who are trekking for the first time, as it is a combination of trekking and a helicopter ride.

Who Should Choose the Standard Everest Base Camp Trek?

The Standard Everest Base Camp Trek is more appropriate for those who wish to do the trek on foot in its entirety. Many experienced hikers appreciate the experience of walking up and down the mountain on their own.

Base Camp Trek with Helicopter Return

It is also a great option for those on a more budget-friendly trip or individuals who prefer to spend more time in the Everest region. The extra days of trekking allow the opportunity to enjoy the scenery of the mountains, the hospitality of the people and the peaceful atmosphere of Himalayan villages.

For some outdoor enthusiasts, the whole trail is more about a sense of achievement.

Final Verdict

There is no single answer on which trek is better, as it depends on what is important to you.

The Everest Base Camp Trek with Helicopter Return is a good choice if you are looking for an easier trek to Everest Base Camp, a shorter physical strain trek and a great time to go on a helicopter ride. It is an adventurous hike and a fun and comfortable helicopter ride.

For those wanting to trek the full length of the Himalayas but wanting to spend more time in the Everest area and want to keep the costs down, the Standard Everest Base Camp Trek will still be a rewarding option.

Either trip will take you to Everest Base Camp, acquaint you with the warm welcome of the Sherpa people and offer amazing views of the world’s highest peaks. Both treks can be a memorable experience that will stick with you long after you come back with a little preparation, realistic expectations and enough time to acclimatise.

Manaslu Circuit Trek for Beginners: Is It the Right Trek for You?

Many people dream of trekking in the Himalayas but are unsure where to begin. Some of the trails are extremely popular and others require some very advanced climbing skills. While the Manaslu Circuit Trek for Beginners sounds like a great adventure, it may be a question as to whether it is the right choice for you if you are looking for a less crowded trek with beautiful scenery and a sense of adventure.

The Manaslu area is one of the most beautiful trekking areas of Nepal. Follows quiet villages, woodlands, rivers, suspension bridges and high mountain passes, all the way back to the lower valleys. This hike isn’t for the faint hearted that prefer less difficult hikes like Ghorepani Poon Hill or Poon Hill, but it is not impossible for many first-time trekkers if they’re well prepared, have realistic expectations and are physically fit.

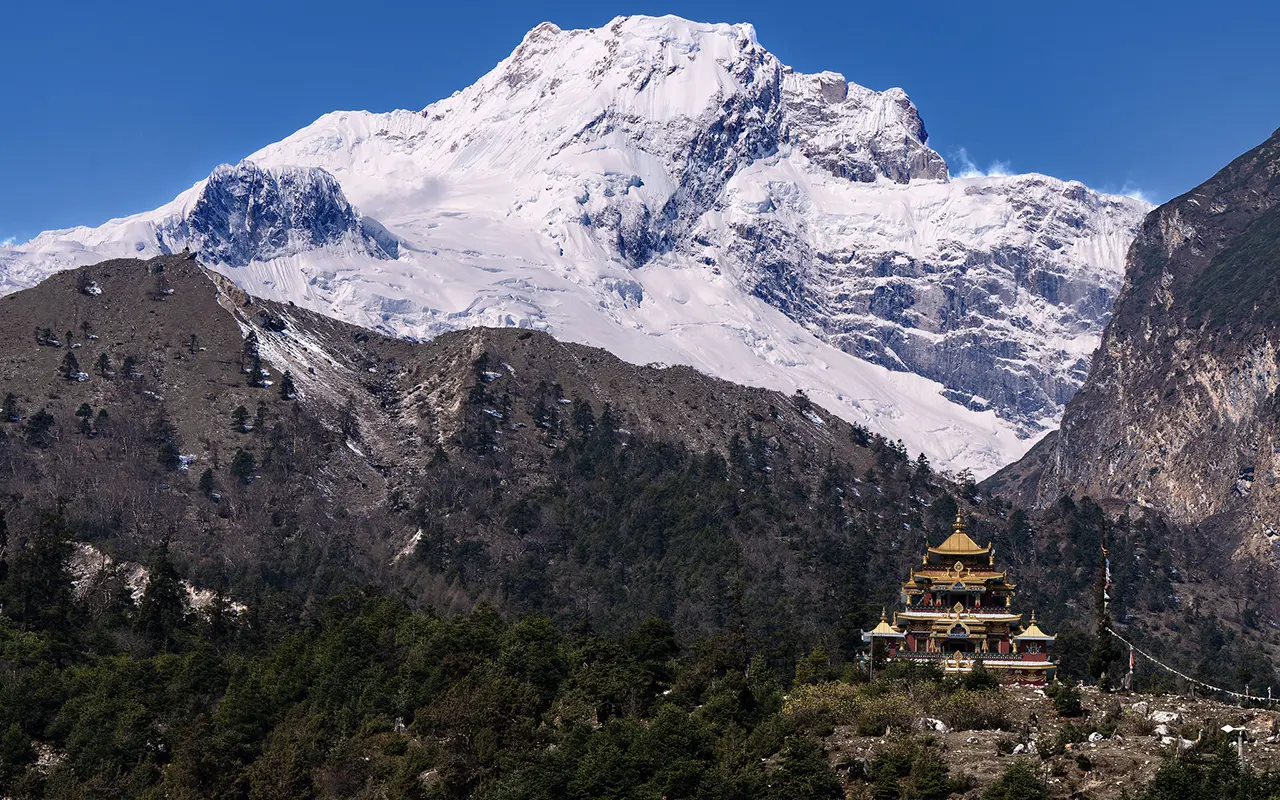
Manaslu Circuit Trek

This guide is aimed at those who are new to the adventure and explains all they need to know before embarking on this. At the end, you will be aware of whether or not this trek is suitable for your experience, fitness, travel objectives and tolerance to high altitudes.

What Makes the Manaslu Circuit Special?

The Manaslu Circuit Trek is a trek that encircles the world’s highest 8th mountain, Mount Manaslu (8163 m /26781 ft). The area is not as crowded as some other trekking areas in Nepal and the limited number of visitors, controlled by a restricted area permit system, means that it remains peaceful.

The path winds through the heritage villages of the mountain, still abiding by customs that have not changed over the years. As you ascend, the terrain shifts from green hills and farmland to pine trees, alpine meadows, rocky valleys and snowy peaks.

Most of the hikers love this hike because it’s a different day every day. For most of the way, you’re passing the scenery, different cultures and incredible views of the mountains without the need to walk through the crowds and masses.

Is the Manaslu Circuit Trek Suitable for Beginners?

This is likely one of the most frequently asked questions on the Manaslu Circuit Trek for Beginners. Yes, but only in certain circumstances.

The trek is not a strenuous one and doesn’t require familiarity with the trekking experience. But you should have a minimal fitness level and be prepared to get ready for the journey. This walk is demanding, with long days of walking, a high mountain ascent, a rocky trail and a need for patience and determination.

This hike is done annually by many who are beginning walkers and do it successfully because they walk at their own pace, take time to acclimatize, listen to their leader’s suggestions, drink plenty of water and don’t hurry.

For people who are active and healthy and can train before the trip, it could be a memorable first trip to the Himalayas.

How Difficult Is the Trek?

The Manaslu Circuit Trek is of a moderate to challenging level of difficulty.

The typical trek lasts for six to eight hours a day. Depending upon trail conditions and itinerary, some days may be shorter, others longer. The greatest difficulty is not actually climbing but walking in the process, climbing on changing surfaces and climbing in the ascents.

The most strenuous day is likely to be crossing Larke Pass (5106 m /16752 ft.). The normal time for trekkers to cross the pass is before dawn so that they can make it back safely before the afternoon weather turns. The ascent is gentle and gradual and then a steep descent down the next valley.

Manaslu Circuit Trek View

The day is hard for beginners; however, if you have properly acclimatized yourself on the days leading up to it, it is much more likely that you will make it to the pass safely.

Do You Need Previous Trekking Experience?

Beginner Nepal trekking is not too difficult for those who have experienced trekking in the past. Before even going on a trek, many people train by hiking the hills around them, taking a long walk, doing stair training or any other regular fitness program for several months before leaving.

Consistency, patience and a positive attitude are the most important qualities. Those who remain calm, walk slowly and keep their energy low tend to do better in the first few days than those who try to do too much.

It’s much more beneficial to listen to your guide and pay attention to your body than to do several easy hikes.

Physical Fitness You Should Have

Manaslu Circuit Trek for Beginners isn’t an athletic trek because it demands endurance, but not athleticism.

Walking with the backpack for several hours a day for two or more days in a row, ideally without getting tired, is the ideal condition. Building up leg strength, getting fitter and improving stamina will make the journey far more pleasant.

Preparing by walking uphill, using stairs, cycling, swimming, jogging and regular hiking are all great exercises to get ready. There is an observable difference in training three or four times a week for two or three months before departure.

You don’t have to be an athlete, but if you arrive at the station physically fit, you will be able to enjoy the scenery rather than be physically strained going up every incline.

Understanding High Altitude

One of the biggest challenges of the Manaslu Circuit Trek is the high-altitude trek.

The track slowly rises above 3000m (9843ft), where there is less oxygen in the air. Acclimatisation days are usually part of most trips to help the body acclimatise to the higher elevations.

Some of the side effects of altitude sickness are headaches, loss of appetite, fatigue, dizziness, nausea and sleep problems. These symptoms should never be overlooked.

Walking slowly, drinking ample water, eating properly, avoiding alcohol and following your guide’s directions are the best prevention. When symptoms are severe, it’s always safe to go back to a lower elevation.

Manaslu Trek

Most healthy trekkers experience no serious problems with altitude and make the trek without difficulty with proper acclimatization.

What Is the Trail Like?

Many people take up Beginner trekking in Nepal, in part due to the diversity of terrain and the Manaslu region offers them that.

The path starts in the green hilly areas of the lower river valleys, waterfalls, rice terraces and small villages. Turning further up, the forest thickens before being replaced by alpine scenery and rocky mountain valleys.

There are many suspension bridges to cross and you will be walking along the edge of fast-moving rivers, stone staircases and yak grazing areas all the way to higher elevations close to Larke Pass.

There are some narrow or uneven sections along some of the trails, but no climbing equipment is used.

Accommodation and Food

The accommodation in the Manaslu Circuit Trek is primarily teahouses. Typically, rooms feature a twin bed, blankets, pillows and community bathrooms. There are several villages with showers and charging stations and also extra fees may apply in higher villages.

Food is nutritious and is intended to give sustenance for walking long hours. The most popular is Dal bhat, a combination of rice, lentil soup, vegetables and pickles, which is served in many teahouses for an unlimited number of refills to balance nutrition.

Some simple international dishes will also be available along with noodles, fried rice, soups, potatoes, eggs, pancakes, porridge, tea and coffee. The higher you go, the fewer food choices you get.

Do You Need a Guide?

According to Nepal’s trekking rules, it is compulsory to have a licensed guide for the Manaslu Circuit Trek for Beginners. The Manaslu region is a restricted area and independent trekking is not allowed. All trekkers need to gain permits from a registered trekking agency and have a licensed guide.

This is a positive requirement for beginners! Guides assist in navigation, altitude monitoring, accommodation, local culture, weather and emergencies. These also provide details about how the villages got their name and their traditions and culture along the way and will enhance the journey.

Numerous trekking companies also provide porter services, where you need to bring only your day-to-night necessities.

Best Time to Go

The Manaslu Circuit Trek is best done in the spring and autumn when the weather is favorable.

Spring (March-May) has temperatures that are nice and warm, the rhododendron forests blossom and the weather is relatively stable. The views of mountain areas are generally good during this time.

The autumn (late September to November) is the most popular trekking season as the sky is generally clear after the monsoon. The visibility is very good and still walkable temperatures.

Heavy snow occurs around Larke Pass in the winter and it is difficult or impossible to cross during certain times. The summer monsoon gives slippery trails, mountain views are lowered at lower elevations and leeches.

Permits You Will Need

Before entering the Manaslu Circuit Trek for Beginners, you need various permits.

The trail eventually steps into the Annapurna region after crossing Larke Pass and trekkers have to acquire a Restricted Area Permit, a Manaslu Conservation Area Permit and an Annapurna Conservation Area Permit.

During the season, permits are priced by the day and the number of days spent in the restricted area. All the applications for permits are typically arranged by your trekking agency before the trek.

Packing for Your First Manaslu Trek

Good packing is key to making Beginner trekking in Nepal more comfortable. Layered clothing is better than carrying heavy jackets, as the temperature can change during the day. Waterproof, warm gloves, hat, sunglasses, trekking boots, thermal layers and sleeping bag are all essential.

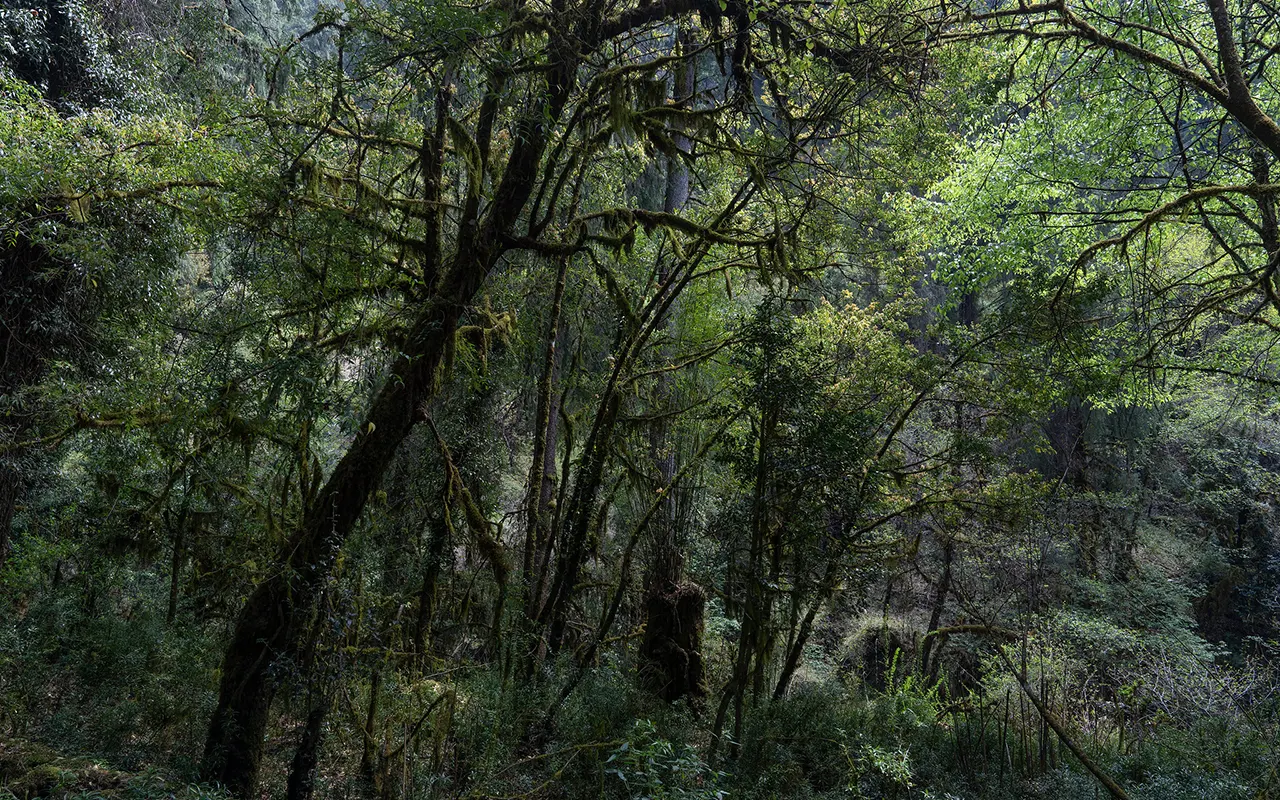
Manaslu Circuit Trek Forest View

Personal medications, a basic first aid kit, a reusable water bottle, water purification tablets or filter, lip balm, trekking poles and a comfortable daypack are also recommended.

Don’t overstuff any gear since it will become obvious quickly when climbing for extended periods of time.

Common Challenges Beginners Face

There are some challenges that each beginner encounters on the trek. The first week might feel tiring and long, particularly if you haven’t done all the hikes for several hours before. Even if you are physically fit, you tend to slow down when you’re at high altitude.

As you get to the higher villages, cold mornings are more apparent. The limited internet connectivity and basic living facilities might need some acclimatisation for those who are accustomed to luxurious accommodations and faster internet.

Luckily, most novices do adapt after a few days and soon enjoy the slower pace of life on the mountain.

Tips for a Successful First Trek

The Manaslu Circuit Trek for Beginners is actually a much easier trek when you take the approach of steady progress rather than fast.

Even if you feel like walking briskly, do it slowly at the outset. Regularly drink water all day and eat adequate meals to keep energy up. Get plenty of rest when possible and don’t compare yourself with those who run quicker.

Follow the advice of a guide; don’t be afraid to admit if you’re feeling unwell; and take acclimatisation seriously. Keep in mind that it is more important to arrive at the finish line safely than fast.

It can be more important to maintain a positive attitude in challenging parts of the journey than physical power.

Is the Manaslu Circuit Worth It for Beginners?

Many individuals say “yes”. The Manaslu Circuit Trek is a great combination of adventure, culture, mountains and self-satisfaction. It is a more challenging trek than the shorter ones, but the rewards are tranquil scenery, friendly villages and a more authentic Himalayan experience, with less of the tourist overload that would be found in many popular trekking areas.

With careful planning, training before the trip, an appropriate route, sufficient acclimatisation days and good guides, this trek can be a great initiation into longer trips to the Himalayas.

Final Thoughts

When you’re making the important decision of choosing your first Himalayan trek, the Manaslu Circuit Trek for Beginners is certainly worthy of consideration. It’s not a walk for the faint of heart but it’s not for the extreme adventurer only either. Many beginners make the trip successfully every year, with good physical preparation, realistic expectations and respect for high altitude.

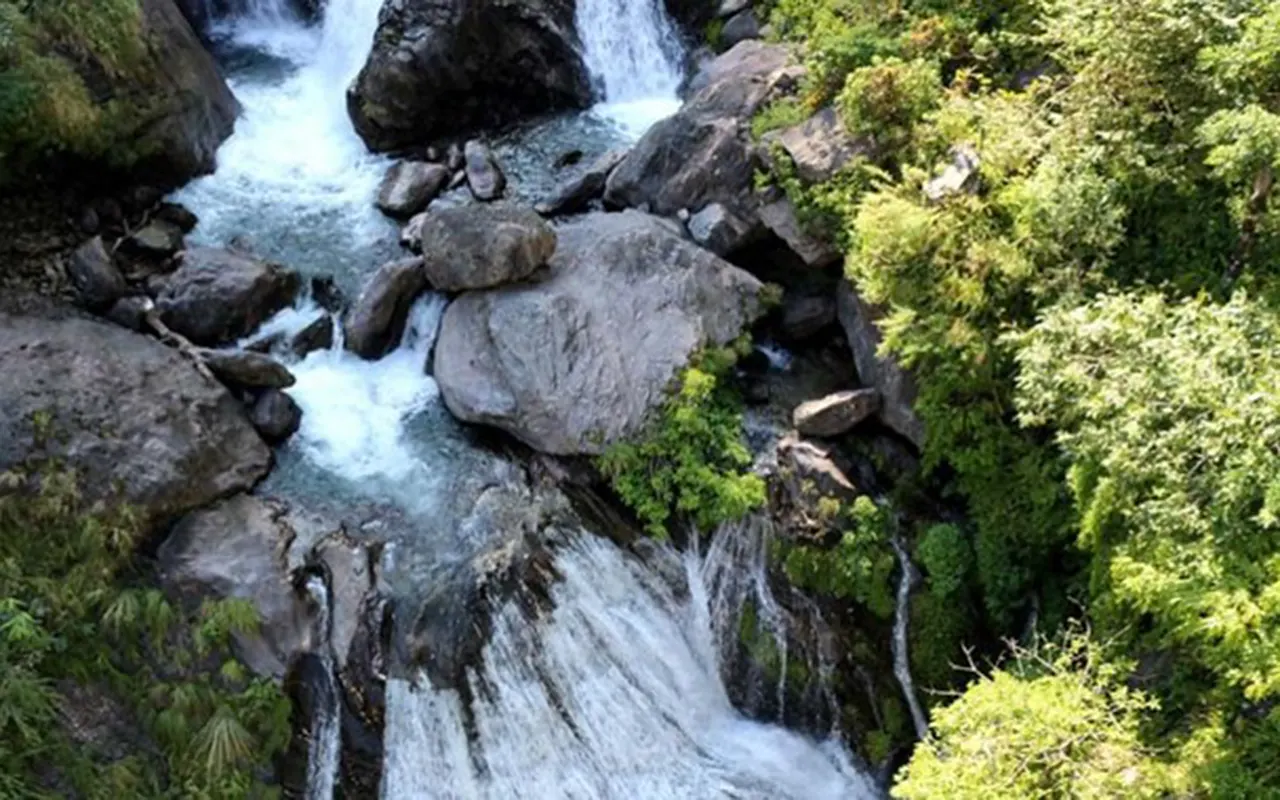
Manaslu Circuit Trek Waterfall

It is an experience that will make you patient, tough and sensitise you to the beauty of the valleys, the traditional communities and the unmatched Himalayan landscape. The Manaslu Circuit Trek for Beginners is designed to be a challenging trek with a small group to get to know the other side of Nepal, the quieter side, if you are ready for it.

Everything You Need to Know Before the Everest Three Passes Trek

The Everest Three Passes Trek is one of the most complete trekking adventures in the Everest region of Nepal. It will take you off the beaten track of Everest Base Camp and across three high passes, linking beautiful Sherpa villages, tranquil valleys, turquoise lakes, ancient monasteries and spectacular Himalayan viewpoints. For those seeking a strenuous trek which exposes nearly all of the major sights of the Khumbu area, this is ideal.

This trek is not the typical Everest Base Camp trek, so it will take more time and require greater physical fitness and preparation. The prize is an adventure, a culture, a spectacular mountain view and an experience you will never forget again. It is essential to know the route, what the challenges are, what permits are needed, the best time to take it and how to prepare properly before going on this journey. This guide provides you with all of the necessary information before you begin the Everest Three Passes Trek.

What Is the Everest Three Passes Trek?

Everest Three Passes Trek is a circuit trek in the Everest region of Nepal that crosses three of the major passes in the region. These are Kongma La Pass at 5,535 m (18,159 ft), Cho La Pass at 5,420 m (17,782 ft) and Renjo La Pass at 5,360 m (17,585 ft). Every pass has its own view of the Himalayas and its difficulties.

Everest Three Passes Trek View

The trail also offers many wonderful places to visit, including Lukla, Namche Bazaar, Tengboche, Dingboche, Chhukung, Lobuche, Gorak Shep, Everest Base Camp, Kala Patthar, Gokyo Valley and the beautiful Gokyo Lakes. It is a circuit trail, so trekkers get new scenery virtually every day.

Why Choose This Trek Instead of the Everest Base Camp Trek?

Many people are not sure whether they should go for the Everest Base Camp trek or the Everest Three Passes Trek. It will depend on your experience, fitness and time.

The Everest Base Camp trek predominantly concentrates on the most renowned Everest Base Camp and on Kala Patthar. Both of these are part of the Three Passes route, which also incorporates three steep mountain passes and the scenic Gokyo Valley. This makes for a much more interesting trek.

There are also some parts of the trail where the crowd is reduced due to many visitors only coming to Everest Base Camp. The Everest High Passes trek is more adventurous if you are looking for more exploration of the Khumbu region and has a wide range of possibilities.

The Three High Passes Explained

The main highlight of the Everest Three Passes Trek is the crossing of all three passes that the trek is named after.

The Kongma La Pass is the most difficult of the three, measuring 5,535 m (18,159 ft). It is a steep climb, a rocky trail and no villages lie between Chhukung and Lobuche. In this portion, good weather is particularly essential.

Cho La Pass is 5420 m (17782 ft) high and links Lobuche with the Gokyo valley. In some seasons, the trekkers have to pass through snow, ice or a small glacier. The view from the top is amazing and the Gokyo Valley is one of the most beautiful along the route.

Renjo La Pass (5,360m/17,585ft) is considered to be the most beautiful pass. This is the highest point and from there, there are views of Mount Everest, Gokyo Lakes and several other Himalayan peaks. The next leg is at Namche Bazaar.

How Difficult Is the Trek?

This Everest Three Passes Trek is considered a difficult trek. It is not suitable for people with poor physical fitness or for those with limited previous trekking experience, but it can be done by very careful, determined beginners.

Most days on the treks are around 6 to 8 hours and crossing passes is 8 to 10 hours. This trek is quite a challenge because of the distances covered, steep inclines and rock paths, as well as the high altitude.

Gorak Shep at 5,164 m (16,942 ft) is the highest sleeping point and Kongma La Pass at 5,535 (18,159 ft) is the highest walking point. Slow pace, drink plenty and good acclimatization are key to success on the Everest High Passes trek.

Best Time for the Everest Three Passes Trek

For a successful Everest Three Passes Trek, one of the most crucial elements is selecting the perfect season.

One of the best seasons is in the spring (March to May). They are a comfortable temperature, rhododendrons grow in the lower elevations and mountain views are good to excellent almost all of the time. The trails are busy but lively.

Everest Three Passes

Another good period is in the autumn, between late September and early November. After the monsoon, the skies are usually very clear, offering outstanding visibility across the Himalayas. Stable weather also means that crossing the high passes is safer.

Winter (December to February) is possible but very cold. The passes can be closed for long periods of time during heavy snowfall. Tricky trails, clouds and rain during the monsoon months, June and early September, make it slightly less popular for most trekkers.

How Long Does the Trek Take?

The typical length of the Everest Three Passes Trek is 18 to 21 days. It’s arrival in Kathmandu, flights to and from Lukla, acclimatisation days and plenty of time to cross all three passes safely.

Typically, acclimatisation days will be spent at the Bazaar at Namche (3440m / 11286 ft) and Dingboche (4410m / 14469 ft). These rest days are for acclimatization and can significantly help to minimize the risk of altitude sickness.

It is always better to add more days as flights to Lukla may be delayed due to changes in weather in the mountains.

Altitude Sickness and Acclimatization

One of the most difficult aspects of the Everest Three Passes Trek is its high elevation. Above 3,000m (9,843ft), the air is less dense and the amount of oxygen in it is decreasing. This impacts each of the trekkers differently, no matter the age or fitness.

Symptoms include headache, loss of appetite, dizziness, nausea, tiredness and trouble sleeping. Failure to recognize these signs may result in the development of more severe illnesses that will require immediate descent.

A steady itinerary, a smart plan of drinking water intake and the avoidance of alcohol, adequate food intake and adequate acclimatization time will significantly enhance the odds of being healthy throughout the trip. If symptoms are severe, the best course of action will be to move down to a lower elevation.

Required Permits

Before starting the Everest Three Passes Trek, every trekker needs to have the necessary permits.

Since the path is a part of the Sagarmatha National Park, a permit is necessary to enter the park. The trekkers should also obtain the Khumbu Pasang Lhamu Rural Municipality Permit, the replacement for TIMS in this region.

For treks with a registered company, these permits are generally arranged by the guide before the trek.

Accommodation and Food

Accommodation is available in tea houses all the way throughout the Everest Three Passes Trek. Most rooms are basic but comfortable and typically come with two single beds, blankets and shared bathrooms. The facilities are increasingly basic and prices gradually rise with the increase in height, since these are carried by porters and yaks.

Everest Three Passes Mountain View

The variety of meals is quite wide. The most popular meal is dal bhat – it has a lot of energy. Common meal varieties include fried rice, noodles, soups, potatoes, pasta, pancakes, eggs and porridge.

It is imperative to have sufficient water intake. You should use purified water or buy boiled water to lessen the waste of plastic bottles and stay hydrated during the Everest high passes trek.

Physical Preparation

It is important to get ready for the trek. Training should be started at least two to three months prior to departure.

Running, bicycling, climbing stairs, going for walks, hiking with a backpack and swimming all help to promote cardiovascular fitness when done uphill. Leg and core strength training decreases fatigue on long trekking days.

The value of mental preparation is also great. The weather can change rapidly, the trails can be challenging and flexibility may be required. When things get tough, staying positive makes it enjoyable to go through.

Essential Gear

The Everest Three Passes Trek requires the correct gear since conditions can change drastically from the lower villages to the high passes.

Wearing multiple layers enables you to adapt to varying circumstances during the day. It is highly recommended to bring in a warm down jacket, waterproof outer layer, thermal base layers, gloves, a wool hat, sunglasses, sun cream, trekking poles and broken-in hiking boots.

At higher altitudes, you’ll need a sleeping bag that is rated for cold weather and will offer additional comfort during cold nights. Other items that can be helpful include a headlamp, reusable water bottles, water purification tablets and a personal first aid kit.

Can Beginners Complete the Trek?

Many people wonder if they’re up for the Everest Three Passes trek if they are beginners. It is not as much an experience as preparation that makes the difference.

With regular exercise, training before the trip, a slow pace and listening to their guide, the trek will be successful. But for a total beginner who has not done much fitness training and has no experience of trekking, the trip can be daunting.

For people who haven’t done trekking at high altitudes, they should first do a shorter trek in the Himalayas to get accustomed to the altitude before doing the trek for this one.

Should You Hire a Guide and Porter?

It is recommended to hire a guide for the Everest Three Passes trek. Trails are usually well marked, but the passes can be more difficult due to weather conditions, snow and changing trail conditions of the trails.

Your knowledgeable guide takes charge of logistics, will track your health, arrange your lodging and gives great local knowledge along the way. Most of your bags will be carried by your porter, which will also lessen the strain on your back and make for a more enjoyable journey.

Mountain Views Along the Route

One of the best things about the Everest Three Passes Trek is the scenery. On the way, one can see the impressive mountains of Mount Everest, Lhotse, Nuptse, Makalu, Cho Oyu, Ama Dablam, Pumori, Thamserku, Cholatse, Taboche and many more.

Everest Three Pass Mountain View

Kala Patthar (5545m/18192ft) is still one of the best places in the Everest to see the views. Another memorable view from the Gokyo Ri at 5,357 m (17,575 ft) overlooks the Gokyo Lakes and surrounding mountains.

The Everest Base Camp Three Passes Trek is one of the most rewarding trekking routes in Nepal thanks to these views.

Final Thoughts

The Everest Three Passes Trek is more than just a tough walk. It is a one-stop adventure through the heart of the Everest region featuring iconic sites, less-known valleys, rich Sherpa heritage, high mountain passes and memorable Himalayan views.

With adequate preparation, reasonable expectations, a well-planned acclimatization and suitable equipment, your chances of successfully reaching the summit are significantly enhanced. It’s not as easy as the classic Everest Base Camp trek, but its benefits are also higher. The Everest Three Passes Trek is a truly Himalayan adventure and one that will be with you for a lifetime.


Ghorepani Poon Hill Trek Cost in 2026–2027: Complete Budget Breakdown

Ghorepani Poon Hill Trek is among the most popular short trekking circuits in Nepal. It is ideal for beginners, families and advanced trekkers looking for stunning views of the mountains without the time of a week-long trek. This trek passes through lovely Gurung and Magar villages, rhododendron forests, terraced slopes and typical mountain lodges, before arriving at Poon Hill (3,210 m, 10,531 ft).

Many travelers want to know the cost of the Ghorepani Poon Hill Trek before planning a trip to this trek. It will depend on your travel style, the season, whether you travel alone or with a guide and the services that you select to determine the total budget. This trek is not a very costly experience as compared to more extended treks in the Himalayas, but it is essential to understand every expense before landing in Nepal.

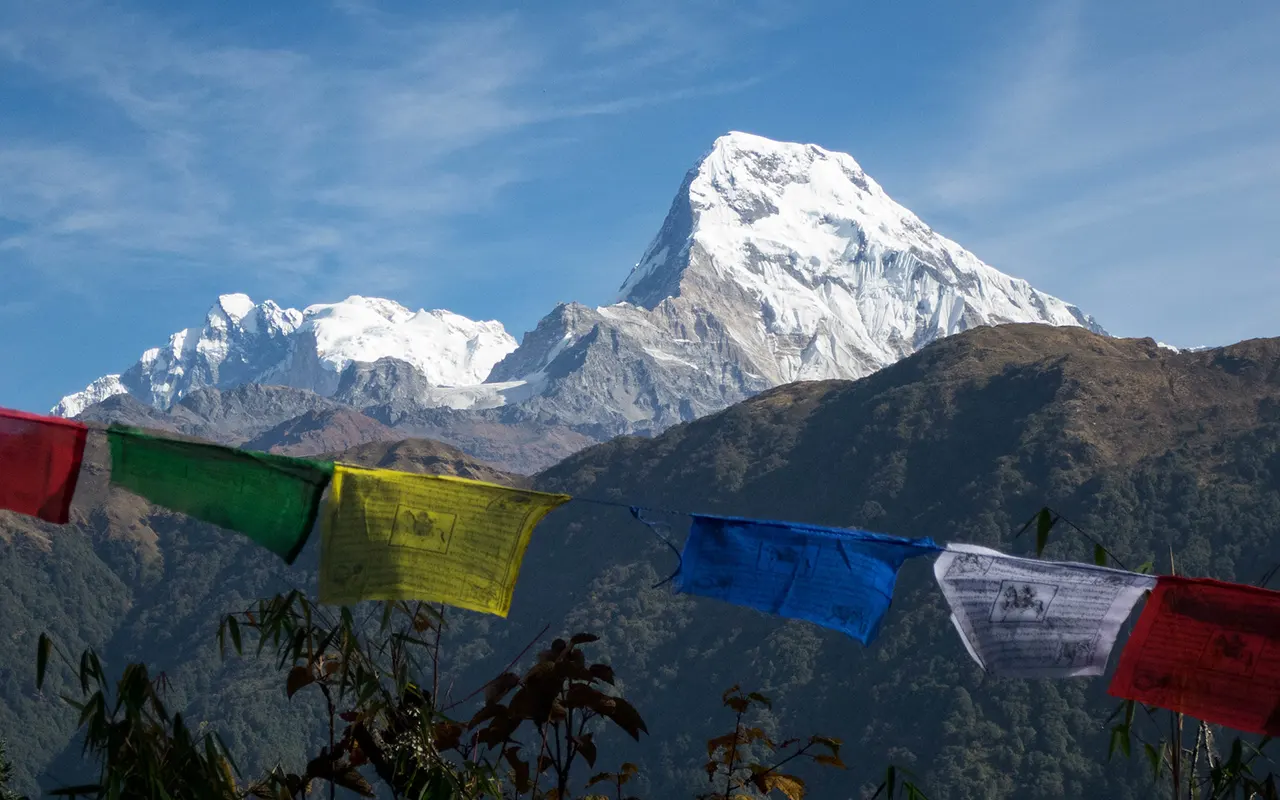
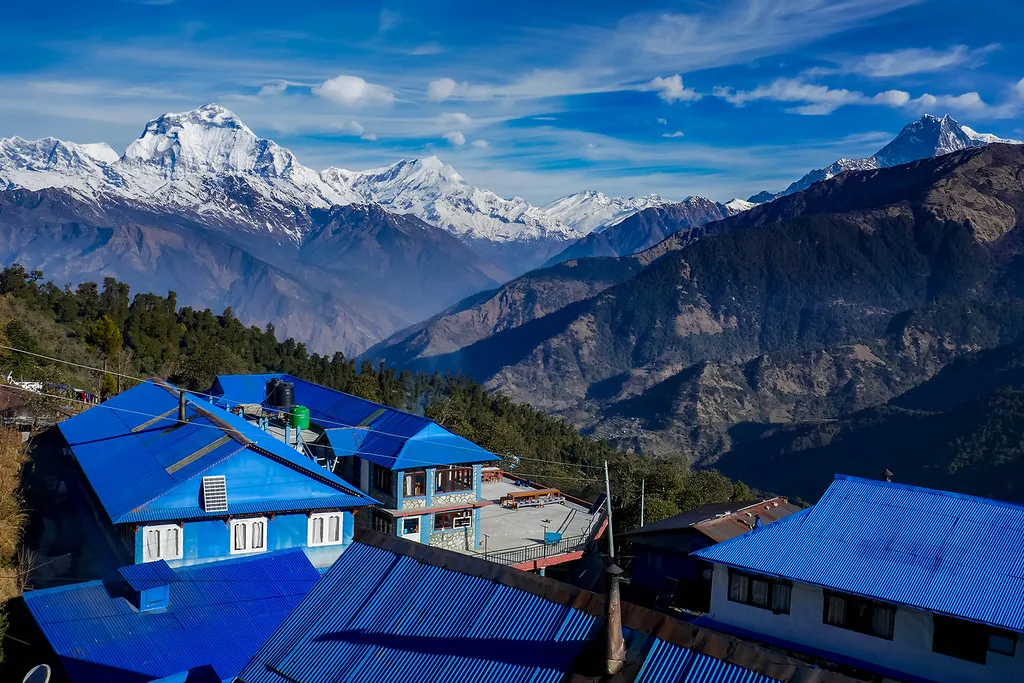
Ghorepani Poon Hill Prayer Flag

This guide gives you an idea about the Ghorepani Poon Hill Trek Cost 2026-2027 including approximate costs for permits, transportation, lodging and meals, guides, porters, equipment, insurance and personal expenses. At the end, you will have a realistic sense of how much you will need to invest for the adventure.

Average Ghorepani Poon Hill Trek Cost in 2026–2027

The total cost of the Ghorepani Poon Hill Trek will depend on the way you arrange the trek. Independent trekking typically costs less and guided packages cover the cost of transportation, permits, lodging, food and trekking staff.

You can do the trek as a budget trek for roughly USD 350 to USD 550. The typical mid-range trip is USD 600 to USD 900, depending on the additional services, hotels in Kathmandu and Pokhara and private vehicle usage. If you want a more luxury trip, you can expect prices of USD 950 to USD 1,300 or even higher.

These estimates are reasonable for the 2026 and 2027 trekking seasons, but may be adjusted slightly based on inflation and local operating expenses.

Estimated Cost Breakdown

The table below gives you an approximate Ghorepani Poon Hill Trek Price for various sections of the trek.

Expense Estimated Cost (USD)
Annapurna Conservation Area Permit (ACAP) 30
TIMS Card (if required through your trekking arrangement) Varies by trekking arrangement
Tourist bus between Kathmandu and Pokhara (round trip) 25 to 40
Private vehicle (optional) 180 to 350
Pokhara to trailhead transportation 20 to 60
Tea house accommodation 8 to 20 per night
Meals during the trek 25 to 40 per day
Guide 30 to 40 per day
Porter 25 to 35 per day
Drinking water 2 to 5 per bottle
Charging and Wi-Fi 2 to 8 per service
Trekking gear rental 40 to 120
Travel insurance 60 to 150
Tips for the guide and porter 70 to 150

The numbers are helpful to take into account when calculating your Poon Hill Trek Budget.

Trekking Permit Costs

Those who want to visit the Annapurna region must have the Annapurna Conservation Area Permit. Most international visitors will have to pay a permit fee of around USD 30.

Due to changes in trekking regulations over the years and the nature of trekking (with or without a registered trekking agency), the TIMS requirement has varied. Because trekking policies are subject to change at any time, it is always a good idea to check the most recent policy and requirements before travelling.

Ghorepani Poon Hill

Permit fees are just a part of the total Ghorepani Poon Hill Trek Cost and should be considered from the start.

Transportation Expenses

Another significant aspect of the overall Ghorepani Poon Hill Trek Cost is transportation. Transportation is another crucial element of the overall Ghorepani Poon Hill Trek Cost.

The majority of travelers will first go from Kathmandu to Pokhara. The cheapest option is a tourist bus, which typically costs USD 12 to USD 20 one way. Flights are quicker but much more expensive, anywhere from USD 100 to USD 140 one way, depending on the season.

You must get a vehicle from Pokhara to the trailhead of the trek. Most trekkers start their trek from Nayapul or Ulleri, but some trekkers drive further into the hills and start from Banthanti. Shared jeeps can be found and are on the cheaper side and private jeeps are more comfortable and are on the higher end of the price.

With the option of private vehicles or domestic flights, your mode of transport may significantly influence your total Ghorepani Poon Hill Trek Price.

Accommodation Costs

When travelling, simple but comfortable tea houses are used to stay the night at every stop. The rooms are mostly double-bedded, include blankets and pillows and share bathrooms. Several villages now have attached bathrooms as well that come at a premium.

The average price of accommodation ranges from USD 8 to USD 20 per night. The prices rise a little in the peak trekking period (Spring and Autumn), particularly in popular villages like Ghorepani.

Numerous tea houses offer reduced room rates for those who dine at them. The food sales are the primary income for the lodge owners, so it is very beneficial for both trekkers and the local businesses.

Ghorepani Poon Hill View

Accommodation is one of the less expensive aspects of the Poon Hill Trek Budget.

Food and Drinks During the Trek

As you get further up the mountain, food prices slowly rise as supplies are brought up the mountain by porters, mules or vehicles if there are roads.

Breakfast typically ranges in price from USD 5 to USD 8. The average price for lunch and dinner is USD 6 to USD 10. Popular dishes are dal bhat, fried rice, noodles and pasta, soup, eggs, pancakes, potatoes and Tibetan bread.

Most trekkers will find it is realistic for a day’s worth of food to be USD 25 to USD 40.

Water costs are also part of the cost of drinking water. It will be very expensive to purchase bottled water daily. The most cost-effective and environmentally efficient option is to bring a reusable water bottle that is equipped with purification tablets or a water filter.

Food and drinks constitute a major part of the Ghorepani Poon Hill Trek cost so it is essential to plan the cost of a day’s food and drinks.

Guide and Porter Costs

By hiring a licensed guide, you can ensure that you are traveling safely, navigating effectively and enjoying a more enriching trekking experience. Guides also provide cultural and traditional explanations and discuss the mountains and landscapes, offering assistance in the logistics of the trek.

The average cost of a licensed guide is USD 30 to USD 40 per day. Porters’ prices are around USD 25 to USD 35 per day and they normally carry 20 kg of shared luggage.

Trekking staff fees add to the cost for the Ghorepani Poon Hill Trek, but many travellers prefer to travel with them for the better. It also provides jobs in mountain areas.

Equipment and Gear Expenses

If you have some gear for trekking, then the cost of preparation will be smaller. However, for first-timers, there will be certain equipment that will need to be rented or bought.

Common items are sleeping bags, down jackets, trekking poles and crampons in the icy season, but not usually in winter or out of snow.

There are quality and affordable rental shops in Kathmandu and Pokhara to rent equipment. The cost of renting equipment ranges from around USD 40 to USD 120 per trek, depending on the season and duration.

The overall Ghorepani Poon Hill Trek Price can be higher when buying a set of equipment rather than renting, particularly when sourcing it from an outdoor brand.

Travel Insurance

It is highly advisable to take travel insurance for all treks in Nepal.

The Ghorepani Poon Hill Trek is at 3,210 m (10,531 ft), but incidents, illness, weather delays and emergency evacuation are never predictable. The average price range for ideal travel insurance for Nepal is between USD 60 and USD 150.

Ghorepani Poon Hill Trek

If comparing between insurance plans, check whether the insurance will cover trekking up to the highest point of your trip and emergency helicopter evacuation should it be needed.

Personal Expenses

There are lots of little costs which go not included in budgeting.

In numerous villages, the internet is available, although it generally comes at a price of USD 2 to USD 5. Another USD 2 to USD 5 will be charged for charging electronic devices. Most tea houses have hot showers, which cost about USD 3 to USD 6.

Most trekkers also purchase snacks, coffee, soft drinks, chocolate, souvenirs or bakery goods along the way. If you add another USD 80 to USD 150 to your Poon Hill Trek Budget, you’ll have a more realistic budget.

Sample Budgets for Other Types of Trekkers

The estimated total cost of various modes of travel is shown in the following table.

Travel Style Estimated Total Cost (USD)
Budget Independent Trek 350 to 550
Guided Group Trek 600 to 850
Private Guided Trek 800 to 1,100
Premium Trek Package 950 to 1,300+


These estimates cover the majority of trekking costs, but do not cover international airfare or the cost of a Nepal visa.

Things that can influence the overall cost

Several factors influence the final Ghorepani Poon Hill Trek Cost.

One of the largest factors is the trekking season. The busiest months are spring (March to May) and autumn (September to November), when prices may increase for rooms to accommodate the surge in demand.

The mode of transport you use will also impact your budget. Tourist buses are a much cheaper option than domestic flights or private cars.

The final cost depends on your preferences for accommodation, food, guide and porter, gear, travel insurance and personal spending.

Itineraries that feature Ghandruk, Tadapani or Jhinu Danda are longer and therefore are more expensive as they have to cover more accommodation and meals.

Tips to Reduce Your Trekking Expenses

To reduce the Ghorepani Poon Hill Trek cost, maintain the level of experience.

You can share guide and transportation costs when traveling with friends. If you are not going on a very regular basis, it is not worth buying new equipment because you can save money by renting it.

Having a reusable water bottle decreases the number of bottles purchased each day. The Ghorepani Poon Hill Trek Price can also be reduced by booking a group package, as the cost of transportation and guides is distributed amongst the group.

At higher altitudes, do not purchase any extra snacks or soft drinks since the prices are gradually raised as they make their way up the mountain.

By planning carefully, you can reduce the amount you spend on the Poon Hill Trek and still have a comfortable trek.

Is the Ghorepani Poon Hill Trek Worth the Cost?

Yes, for many travellers.

Ghorepani Poon Hill trek is a good value trek when compared to the more extended treks in the Himalayas. In a short trek, the visitors witness the beautiful forests, traditional villages, wonderful tea houses, local culture and memorable views of the Himalayas.

The best part of the ride is the sunrise from Poon Hill at 3,210m (10,531ft). When the skies are clear in the morning, you can see amazing views of the Annapurna and Dhaulagiri mountain ranges and every penny is well spent.

The trek is not difficult and doesn’t necessitate costly climbing gear or lengthy logistics, making it among the more budget-friendly mountain experiences in Nepal.

Final Thoughts

It is essential to understand the Ghorepani Poon Hill trek cost before going on this journey to avoid any unforeseen costs. The average traveler can expect to spend USD 350 – USD 1,300, depending on travel style, accommodation, transportation and whether guides and porters are hired or not.

Ghorepani Poon Hill Trek View

When you are calculating the Ghorepani Poon Hill Trek Price, do not limit the calculations to the package price alone; add all the permits, transportation, accommodation, food, insurance, equipment and personal expenditure and spending. To enjoy the Poon Hill trek without having to worry about money, it is important to develop a realistic budget for the Poon Hill trek.

The Ghorepani Poon Hill Trek remains a worthwhile experience for people who want to have a rewarding experience in the Himalayas, provided they are well planned. Whether it’s a self-guided tour or a full package, knowing what to expect will guide you in making your choices and enjoying every trip you make.

How Long Does the Annapurna Circuit Trek Take? Complete Duration Guide

For anyone planning this famous Himalayan adventure, one of the first questions is how much time they need. The route can be done in many ways, depending on the length of each leg, where you start and end, where you go, what you are willing to travel by and whether you take any side trips. Understanding the duration of the Annapurna Circuit Trek Take is important so you can plan a safer, more enjoyable journey without rushing.

The Annapurna Circuit is one of the classic long-distance trekking routes in Nepal. It winds through forests, rivers, farming villages, alpine landscapes and the high mountain pass Thorong La and goes around the Annapurna region. The path will also allow trekkers to experience various cultures such as Gurung, Thakali and Tibetan-influenced communities. Most of the circuit is now accessible by road, but trekking offers a great way to enjoy the circuit and its local way of life without being confined to a vehicle.

Annapurna Circuit Trek Village


What Is the Average Annapurna Circuit Trek Duration?

The most common Annapurna Circuit Trek Duration is 12 – 18 days. Most hikers take about 14-16 days to do the trek to allow for adequate acclimatization, gradual ascent and time to enjoy the trek without pressure.

The full circuit used to take over 20 days a few years ago, as some areas had no roads. Today, the trek can start or end at various locations and be made shorter if preferred by the trekker due to better road access. Despite these alterations, don’t cut back too much on the route since an adequate acclimatization period is very crucial for a safe trek.

When planning the Annapurna Circuit trek, one might ask: How long does the trek take? The answer is partly dependent on the route you take, more than the pace at which you hike. People typically walk 5 to 8 hours a day, depending on the terrain and/or the altitude.

Why Trek Duration Varies

There are a number of factors that can impact the length of the Annapurna Circuit Trek. Your starting point is the first one. Some trekkers take off from Besisahar and others drive further to Chame and then walk from there.

The second factor is the point where you end up. After crossing Thorong La Pass, many trekkers can complete their trek at Jomsom and some continue along to Tatopani, Ghorepani, Poon Hill and then finally Nayapul. This is a longer one, which will take several days, but will offer more varied scenery.

Weather is also a significant factor. During winter, crossings can be affected by heavy snowfall around Thorong La Pass, while during monsoon season, the lower trails can get affected by monsoon rains. Your physical fitness, acclimatization itinerary, as well as rest days, also go into the overall trip.

Standard 14 Day Annapurna Circuit Trek Itinerary

The typical Annapurna Circuit Trek duration is 14 days. On reaching Kathmandu, visitors take road trips to the starting point of Chame or another base for trekking there. The trail then turns uphill through Upper Pisang, Manang, Yak Kharka and Thorong Phedi over the next several days.

The majority of trekkers stay an additional day in Manang to acclimatise to the altitude before going to higher altitudes. This is a very good day to rest and make it back to the other side of Thorong La Pass safely.

Thorong La Pass is the highest trekking point at 5416m (17769ft). Muktinath (3,760 m / 12,336 ft), located on the other side of the pass, is the next stop and it is from there that the trail heads towards Jomsom or other places.

This is a schedule that fits a hiker without being too far or too high.

Annapurna Circuit Trek Take

Can You Complete the Trek Faster?

Some seasoned trekkers manage to trek the Annapurna Circuit in a week or 10-12 days. They tend to go directly to Chame and not go through some of the lower sections and keep a brisk pace.

This can be done, but it is not suggested for first-time visitors. Altitude sickness will likely occur with quick climbs when reaching Manang (3519 m /11545 ft).

No matter how well prepared you are for a hike, altitude adjustment can’t be helped. The body requires time to acclimatize, irrespective of fitness level. A shorter schedule is not recommended unless you have prior experience on high-elevation treks.

When someone asks, What is the duration of the Annapurna Circuit Trek for a fast-paced trek, they might be expecting to hike the circuit in 10-12 days, but it is only during favorable conditions and with adequate preparation!

Longer Itineraries for a Better Experience

Some trekkers like to make the trip more extended to get to 16, 18 or even 20 days. The longer Annapurna Circuit Trek route offers opportunities to more time to be spent exploring the local villages, mountain vistas and cultural experiences.

More days can be dedicated to trips to Ice Lake above Manang, to Gangapurna Lake, to visit the Braga Monastery or the renowned viewpoint at Poon Hill beyond the pass. These side trips offer a more fulfilling experience and give the body the time to acclimatize itself to the increased elevation.

For those with some flexibility in their travel plans, it may be a good idea to add a couple of days to the trip to alleviate fatigue and make the trip more relaxed.

The Importance of Acclimatization

The biggest reason for not rushing the Annapurna Circuit Trek Duration is because of acclimatization. The air is thinner and has less oxygen above 3000 m (9843 ft).

Many trekkers stay for two nights at Manang before going up. Short hikes to high altitudes during this period allow the body to acclimate itself to the high altitudes while sleeping at a lower altitude.

Failure to take acclimatization days is likely to be time-consuming but greatly raises the risk of Acute Mountain Sickness. Symptoms are headache, nausea, dizziness, loss of appetite and unusual tiredness. If the symptoms are severe, it is necessary to immediately descend to a lower elevation.

One of the easiest ways to enhance safety and enjoyment on the trek is to plan ample time.

Seasonal Conditions Can Affect Trek Duration

The Annapurna Circuit Trek is longer than many people realize, due to the weather.

March to May is generally clear, with stable temperatures and good rhododendron blooms. This is one of the most popular seasons as it is typically a reliable trail season.

Late September through November is also a good season of the year. When the weather is clear, there will be great mountain views, but trails and teahouses will be more crowded.

The winter season (December to February) is cold and snowy around Thorong La Pass. These passes may be blocked due to fresh snow cover from time to time or crossings may be delayed.

Muddy lower trails and occasional mudslides are caused by the summer monsoon (June-August). The north side of the circuit, however, is in a rain shadow and is frequently drier than expected.

Daily Walking Hours

On average, the Annapurna Circuit Trek offers 5 to 8 hours of hiking every day. Valley crossings can take as little as five hours, but the crossing of Thorong La Pass can be the longest and most challenging day.

Most of the trekkers start early in the morning on pass crossing day, with cooler morning weather conditions. This ascent to the pass may take 4-6 hours and then the descent back to Muktinath takes 3-5 hours.

This day is physically demanding but is broken up into intervals to make the journey possible.

Annapurna Circuit Trek View

Transportation Can Save Several Days

The traditional Annapurna Circuit Trek Duration is modified by modern roads. Many people instead opt to drive from Besisahar to Chame in a jeep, which cuts the walk from a few days down.

Buses and jeeps are available after reaching Muktinath or Jomsom towards Pokhara. In pleasant weather, domestic flights from Jomsom are also available.

Smart use of the transport facilities enables travellers with a short vacation to enjoy the best of the high mountain sections while not traversing the whole historic route.

Who Should Choose a Short or Long Trek?

The perfect duration for the Annapurna Circuit Trek is dependent upon your experience and travel objectives. First timers typically get 14-16 days because it allows for adequate acclimatization and less physical stress.

Weather permitting, experienced hikers who have done similar high-altitude treks in the past can do the route in a shorter number of days.

Longer trips are also great for photographers and nature enthusiasts and for cultural travelers, to visit various villages, monasteries and viewpoints without the need to rush from one to another each day.

Most trekkers prefer to take a more flexible route, as it allows them to enjoy the journey more.

Common Mistakes When Planning Trek Duration

Many tourists to Nepal need to shape up a speedy Annapurna Trek for their trek because they simply add up only the walking hours. Always add transportation time, acclimatization days and weather changes to your travel time.

Another frequent error is booking flights at the end of the trek. Travelling back to the mountains may be interrupted due to unforeseen road closures or weather conditions. One or two additional days in Kathmandu or Pokhara are desirable before international flights.

Recovery time is another factor that some trekkers tend to overlook. Many people like a day of leisure after the high-altitude trip, before they embark on other travels.

Is a Shorter Annapurna Circuit Still Worth It?

Yes. For those planning a shorter Annapurna Circuit Trek, there are ways to have an unforgettable trip to the Himalayas.

The trek from Chame to Jomsom still has a lot of the joys of the trek in it, as does driving to Chame and completing the trek at Jomsom. You will traverse lovely mountain villages, witness the changing landscapes, cross Thorong La Pass and enjoy the incredible mountain views.

While you forego some of the low sections, the short version works well for travelers who don’t have much vacation time to spare, but still captures the most memorable sections of the circuit.

Annapurna Circuit Trek Take View

Final Thoughts

The perfect Annapurna Circuit Trek Duration will depend on the time you can dedicate to the trek, your trekking experience, fitness level and personal interests. Most people find that 14 to 16 days is the ideal time to travel, balance adventure, safety and enjoyment. It lets you climb up to altitude, acclimate and enjoy the scenery and culture along the way that make this trek so special.

Still wondering, what is the duration of the Annapurna Circuit Trek? Keep in mind that there is no fixed answer to this question. Others complete the trip in about 10 days and some take almost three weeks to traverse the area. It’s more important to choose a reasonable timetable than to rush.

A well-designed Annapurna Circuit Trek itinerary allows you the freedom to experience each and every step of the way. With adequate time to acclimatize, adjust to shifts in climate and maintain a flexible day-to-day timeline, you can enjoy one of the most rewarding adventures of your trekking experiences in Nepal without any fear or anxiety.

Mardi Himal Trek Cost 2027: Complete Budget Breakdown

Planning a trek in the Annapurna region starts with understanding the total cost before making any bookings. Many people think that this hike will cost a fortune, but as they’ll find out, it’s not. The cost of the Mardi Himal trek 2027 varies on different factors such as the number of trekking days, transport, accommodation, food, permits, guide service and individual spending. Some tour guide travelers get the experience at a modest cost, while others opt for a more luxurious journey, using private vehicles and available high-end facilities.

The good news is that Mardi Himal is still one of Nepal’s more affordable Himalayan treks. This trek is shorter than longer trails like Everest Base Camp and Annapurna Circuit, which may take more days and cost more. If you travel on your own, with friends or with an organized company like Sherpa Discovery Treks, you will know exactly what to expect of all your expenses and have a realistic budget for your trip.
This guide details all the key costs in the trek and estimated costs for 2027, along with some tips on how to save money and the average amount you should consider for your trip to Nepal.

Average Mardi Himal Trek Cost 2027

The Mardi Himal Trek Cost 2027 is typically USD 420 – USD 950 per person, which depends on the type of travellers you are.

With the help of shared service arrangements for guides, using public transport and staying in basic tea houses, the trek can be done on a budget for USD 420 to USD 550.

Most international trekkers opt for a basic package of permits, accommodation, food for the trek, transportation and guide services. The average price of these types of packages is between USD 550 and USD 750.

Those who prefer more comfort, private transportation, better Kathmandu and Pokhara hotels and a more personalized service may expect to spend USD 800 to USD 950 or more.

A general estimate is given below.

Expense Category Estimated Cost (USD)
Nepal Visa 30 to 125
Travel Insurance 60 to 150
Trek Permits 40 to 50
Transportation 20 to 180
Guide 30 to 40 per day
Porter 22 to 30 per day
Accommodation 8 to 35 per night
Meals 20 to 35 per day
Drinks and Snacks 5 to 15 per day
Charging and WiFi 2 to 8 per day
Tips 50 to 120
Miscellaneous Expenses 50 to 150

The figures are approximate and may vary slightly seasonally and with exchange rates.

What Is Included in a Typical Mardi Himal Trek Price?

The basic cost of the Mardi Himal Trek usually covers the permit fees, transportation from Kathmandu to Pokhara, transportation from Kathmandu to the trek point, lodging during the trek, government taxes, meals on the trek, an experienced licensed guide and airport transfers.

A few trekking companies also offer a first aid kit, emergency support, route planning and permit assistance before the trek. It is crucial to look at the included options before comparing prices among companies instead of going with the cheapest option.

Cheaper packages might not include meals, porter services or transportation, which will add to the costs of the trip.

Permit Costs

All trekkers are required to have the necessary permits before they enter the trekking area. Two permits are included in the Mardi Himal Trek Cost 2027.

The first one is called the Annapurna Conservation Area Permit or ACAP. The cost of this permit is about NPR 3,000 for foreigners.

The second one is the TIMS requirement. Occasionally, regulations are subject to change, so it is best to check with your trekking company as well as with the tourism authorities in the area before heading out on your trek.

In total, permits cost about USD 40 to USD 50 for trekkers.

These permits provide funding for conservation initiatives, trail upkeep and local community development across the Annapurna region.

Mardi Himal Base Camp

Transportation Costs

Another component of your Mardi Himal trek budget is transportation.

The majority of visitors to Nepal first visit Pokhara from Kathmandu. The price of tourist buses is typically USD 10-20 per trip. Generally, direct flights to and from home would be priced in the range of USD 90 – USD 130 per ticket, subject to availability and season.

Trekkers from Pokhara head to Kande or Phedi, from where the trek starts. Local buses are only a few dollars and private vehicles are typically USD 25 – USD 50, depending on the vehicle size.

The majority of trekkers head back to Pokhara at the end of the trek, either by jeep or by local transportation from Sidhing or Lumre. Private cars are more comfortable and shared jeeps are more economical.

Crucially, taking public transport as opposed to a plane can help you save much of your travel costs.

Guide and Porter Costs

It’s highly recommended to have a guide for people visiting Nepal for the first time. All parts of the trail are marked, but because of changing weather, fog and unfamiliar mountain conditions, there may be some challenges.

A qualified licensed guide can usually be found for as much as USD 30 to USD 40 a day. A porter’s charge is approximately USD 22 to USD 30 per day and his capacity for carrying shared luggage is approximately 20 kg between two trekkers.

It’s a common practice to share a porter with another person, thereby cutting costs and making the journey more comfortable.

The advantages of employing local people are not just for safety reasons, but to help communities in the mountains. Being safer is not the only advantage; many trekkers find it is good for the mountain communities too.

Accommodation Costs

The way of accommodation is mainly a traditional tea house along the way.

Mardi Himal Trek price is dependent upon the number of nights stayed at the trekking center and the average price for a night’s stay is USD 8 to USD 15 for a standard room with twin beds. Some knock-down, drag-out lodges lower down are equipped with attached bathrooms and the higher mountain villages have more rustic facilities.

Elevations get easier as rooms get higher. Near High Camp (around 3580 m/11745 ft), the accommodation is basic and comfortable enough for overnight stays. Most tea houses have blankets, but a warm sleeping bag will still be useful when the weather is cold.

The prices of hotels in Kathmandu and Pokhara are also different, ranging from guesthouses to luxury hotels.

Food Costs During the Trek

The Mardi Himal trek cost 2027 includes a considerable amount of food, as provisions have to be transported into the remote mountain villages. Breakfast typically runs at USD 5 – USD 8. Average lunch and dinner costs are between USD 6 and USD 10.

Some typical meals are dal bhat, fried rice, noodles, pasta, soup, potatoes, eggs, pancakes and Tibetan bread. For many tea houses, the free refills are another reason that dal bhat is the best option: it not only fills you up, but it’s also a good deal. The cost of food and drinks is typically USD 20 to USD 35 per day for trekkers.

As elevation increases, prices slowly begin to rise, as it is more difficult to transport goods to the higher elevations.

Drinks, Snacks and Personal Expenses

While planning the budget for Mardi Himal, many trekkers don’t consider some of these small day-to-day expenses.

The further you get up the trail, the higher the price of bottled water. A water bottle that can be refilled with water and contains purification tablets or a water filter can be more cost-effective than buying multiple bottles each day.

The price of tea, coffee, soft drinks, chocolate bars, biscuits and energy snacks is higher in higher villages. An average charge for an electronic device is USD 2 to USD 5 per device.

WiFi (where available) typically ranges from USD 2 to USD 5. In some places, hot showers are an extra USD 2 to USD 5. These little costs can be insignificant on their own, but when added together, they can cost you over USD 50 on the journey.

Mardi Himal Hiking Route

Travel Insurance Costs

Travel insurance is a must. The Mardi Himal route leads to Mardi Himal View Point (4500m/14764ft) and Mardi Himal Base Camp (4500m/14764ft), depending on the route taken. The high-altitude trekking aspect of a trip needs to be covered, as well as emergency helicopter evacuation.

A good travel insurance policy should cost you USD 60 to USD 150, depending on your origin, age and the duration of your tour. Purchasing trekking insurance for Nepal is a smart investment in case of health issues, accidents or extreme weather conditions.

Equipment and Gear Expenses

But if you already have trekking gear, the total Mardi Himal Trek Cost 2027 will be less. There are several items that can be rented and trekkers without equipment can buy equipment in Kathmandu. Typical sleeping bags will cost approximately USD 2 to 3 a day.

Rental of down jackets is around USD 2-3 per day. Other items such as trekking poles, duffel bags, crampons for winter conditions and other accessories can also be rented at affordable prices.  Obviously, the cost of brand new equipment will be higher, but hiring may be enough for your one trekking trip.

Best Ways to Reduce Your Mardi Himal Trek Budget

You don’t have to sacrifice the quality of your experience to save money. Package prices are usually better during the spring or fall season if one has booked early. Daily costs are reduced by sharing with another trekker, but at the same time, it does not affect the level of comfort.

Tourist bus service between Kathmandu and Pokhara makes the transportation much cheaper than travelling by air. Using a reusable water bottle rather than purchasing one each day saves money and helps to eliminate plastic waste.

With an experienced company, one can often get a better deal on a complete package than having to arrange each service on their own, since it covers all of them: transportation, permits, accommodation and guide services.

Is a Guided Package Worth the Cost?

A lot of travellers are wondering whether to arrange it on their own or to get a package and whether it’s more cost-efficient. If you are a seasoned trekker and have a good familiarity with Nepal, you may save a little money by travelling independently.

But for first-time visitors, a package with a guide can be more of a value. The Mardi Himal Trek price covers all logistical support, permit arrangements, accommodation bookings, transportation planning, local knowledge and emergency help.

For those interested in customizing their trips, companies like Sherpa Discovery Treks are also available to make adjustments to the travel itinerary if weather or health conditions change during the trip.

If you take into account what’s convenient, safe and local knowledge, many trekkers think that a guided package is worth the extra cost. Use this sample budget for various travelers to work out how much you will need for your trip.

The public transport, simple lodging, shared porter service and decent food can cost about USD 450 to USD 550 for a budget traveller.

If the person has chosen the comfortable Kathmandu and Pokhara hotels, has opted for private guide services and has improved means of transport, they can expect to spend about USD 600 to USD 750 for a mid-range traveler.

Those who prefer the highest level of comfort, whether for themselves or their guests, with private transport, luxury hotels and bespoke services, can expect to pay from USD 800 to USD 950.

The following estimates include the major expenses of the trek but exclude international airfare to Nepal.

Mardi Himal Trek Cost

Final Thoughts

In comparison to many of the popular trekking routes in the Himalayas, the Mardi Himal Trek Cost 2027 is quite reasonable. This trek is deliciously doable within a budget of USD 550 – USD 750 and definitely a not-to-be-missed sight of the mountains with experienced guides and comfortable tea houses.

If you want to avoid spending money that’s not needed, careful planning is the best approach. Knowing the costs for permits, transport, hotel and lodging, food, guides, insurance and personal costs will aid in building a realistic trip budget before you arrive in Nepal.

If you’re looking for a budget-friendly trip or a comfortable one, understanding the anticipated Mardi Himal Trek budget will help you plan accordingly. You should consider not just the lowest advertised price, but what’s included in each Mardi Himal trek price, in order to select the most cost-effective one on which you can enjoy your adventure.

Everest Base Camp Trek in Different Seasons: Which Month is Best ?

This blog will provide you with detailed information on all seasons. Additionally, this blog helps you know how the Everest Base Camp Trek Seasons are affected by the different seasons of the year, namely spring, summer, fall, and winter. You will also get to know the pros and cons of walking at different times of the year to help you plan your trip.

Being aware of the changes throughout the year will enable you to pick the best time to visit Everest Base Camp Trek Seasons, whether you are looking for blue skies, fewer people, or vibrant nature.

Understanding Everest Base Camp Trek seasons

Nepal has four ideal trekking seasons, and each adventure season is unique in terms of weather conditions and packed with new experiences. A nice understanding of these seasons is useful for trekkers to find the best seasonal time for the trip.

At the beginning of the warmer season of spring (March to May), rhododendrons begin to bloom. Trails during this time are not very crowded, but the haze and showers are expected to increase throughout the season.

The period of the summer or monsoon (June to August) is characterised by heavy rainfall, high temperatures, and high humidity. The trekking routes are challenging due to rainfall, which makes them slippery.

Autumn (September to November) is the high trekking season. This is the best of the four seasons due to stable weather, mild temperatures, and mountain views that are crystal clear. Fall will have the greatest number of trekkers; although trails will be busier, overall conditions are at their best. This makes Autumn one of the most popular Everest Base Camp Trek seasons.

Winter (December to February) is consistently cold, especially at higher elevations. During this Everest Base Camp Trek Season. Winter sees fewer trekkers and many fewer crowded trails. If you engage in lower hiking, lower trekking routes are accessible. If you choose higher passes, snow and ice will hinder progress and possibly require skills using technical gear.

Everest Base Camp Trek in Spring (March to May)

Although each season has its unique features, there is no better time to trek the Everest Base Camp trail than in spring. The skies are clear, and the temperature is mild, which rarely falls below freezing. The vibrant bloom of rhododendrons and wildflowers along the way provides a colourful environment to walk in.

You can see Everest and the neighbouring peaks best in the spring. Trekking is comfortable with day temperatures being warmer. The scenery showcases the best photos with vibrant colours of blooming flowers along the paths.

Spring is an extremely popular time to trek, and suddenly crowded trails can be your experience. Afternoon clouds can block mountain viewing occasionally, but most morning offerings are clear and bright.

Spring is a great time to trek mountain paths for avid photographers and nature lovers. For first-time trekkers, the visual experience provides incredible views to embrace while also enjoying comfortable weather. The breathtaking views combined with comfortable weather conditions create one of the most worthwhile treks on the path of the EBC trek.

Everest Base Camp Trek in Summer (June to August)

The Everest Base Camp trek in the summer monsoon season, typically from June to August, is a warm, wet, and humid experience with wet and slippery trails and, in many cases, obstructed views of the mountains due to clouds.

A significant plus of travelling during the monsoon is that you will experience fewer trekkers on the trail, which makes the trek quieter and more appropriate. During the summer, a beautiful and lush green landscape is to be seen everywhere you look.

However, the drawback of trekking in the monsoon is the heavy rainfall, which means muddy trails, leeches, and the possibility of landslides. The flight to Lukla can be delayed or cancelled due to weather, which makes travel difficult.

If you are an adventurous trekker seeking solitude and do not walk in the rain, then this season is perfect for you. With thoughtful planning and mindful flexibility, the monsoon in Everest Base Camp offers an ideal experience while being in a quieter state.

Everest Base Camp Trek in Autumn (September to November)

Autumn in the Everest Base Camp Trek also provides fantastic weather with cool, dry, and stable conditions. This weather provides clear visibility of Everest and surrounding peaks, allowing a full experience while taking epic views and photos.

Autumn offers great temperatures with mild days and chill nights, particularly at higher altitudes. Autumn has dry conditions, which minimise the risk of rain and make your trek safer and more enjoyable.

Autumn in Nepal is also known for its festive environment because of the two main festivals: Dashain and Tihar. If you visit Nepal at this time of year, you can enjoy the vibrant Nepalese festivals. However, this popularity causes the trails and teahouses to be fully packed with trekkers. So, it is a good decision if you book the accommodation early during these festive times.

Overall, for all types of trekkers, autumn is the best season to go for the Everest Base Camp trek because of stable weather, excellent temperatures, and amazing mountain views. Autumn describes the Everest Base Camp trekking experience with complete balance and reward.

Everest Base Camp Trek in Winter (December to February)

Everest Base Camp trek in winter is extremely cold because of the heavy snow at high altitudes. But you will enjoy the view of the mountain covered in snow, and snow produces some of the most breathtaking scenery.

Due to snow, there are fewer trekkers on the trail, providing you with a sense of solitude. The peaceful experience on the trail with snow-covered scenery creates an amazing, stunning backdrop for the adventure.

But the snow and the extreme cold, especially at night when the temperature can drop below freezing, do present challenges. Snow can also result in flight cancellations, particularly for access to Lukla airport.

Winter is best suited for experienced trekkers who can handle cold weather and potential disruptions resulting from the weather. If you are up for great rewards from a demanding trek to Everest Base Camp, then winter is the season for you.

Comparing the Seasons: Which Month is Best?

The peak time of year for trekking to Everest Base Camp is October to November. It has the best weather & mountain visibility you could ask for, and it will be the most stable weather you are going to get in the region. Overall, autumn is the best time of year to trek.

The second best time to trek to Everest Base Camp is March to May because of pleasant temperatures & is very colourful with flowers that are blooming. The views are still very good in spring, and the temperatures and conditions are usually pretty comfortable for trekking.

If you want to escape the crowds, then you should consider travelling in winter, from December to February. Very cold, but wonderful, quiet trails and beautiful snowy scenery if you are an experienced trekker.

The least recommended months would be June to August in the monsoon season. It will be extremely wet with lots of rain, which causes slippery trails, and you will have very limited visibility of the mountains. Generally, it will be a challenging experience and not very enjoyable.

Additional Factors to Consider

Physical fitness and climbing experience will come in handy during the Everest Base Camp trek. Moderate levels of endurance, leg strength, and mental toughness will help with the daily long hikes and altitude. Preparing adequately with cardiovascular fitness and a strength plan improves your endurance and reduces your chances of injuries while doing the trek.

Make your bookings as early as possible ahead of the peak season, spring and autumn, when the trails can fill quickly with other trekkers and teahouse lodgers. It’s advisable to make reservations as early as possible; this will ensure a better experience with established accommodations and a better seating experience. Planning and preparations avoid the last-minute hassles and headaches of aiming for your preferred dates on this very busy trek.

Know what to pack and prepare each season for your gear. Layered clothing for the spring and autumn treks, heavy-lined insulation for bold winter treks, and waterproof clothing for the monsoon season. Packing the right gear for preparedness will contribute to improved comfort, safety, and fun as you move throughout the trek.

Conclusion

The ideal time for trekking to Everest Base Camp is from October to November for consistent weather and unobstructed views, and March-May for good temperatures and delightful scenery. Don’t hike during winter for the social aspect because the weather is extremely cold. Monsoon also has a lot of dangers while walking to Everest Base Camp because of high rainfall.

For amazing scenery with fewer crowds, consider spring or winter trekking. If you want a well-rounded adventure experience with good weather and rich cultural festivals, then fall is your best option, but it still completely depends on what is most important to you.

Plan your trek based on your fitness and goals. Whether your aim is a true adventure, photography, or peace of mind, it makes sense to choose the right season for your future safe, fun, and memorable experience to Everest Base Camp.

Teahouses in Annapurna Region- What to Expect in Food and Accommodation

This blog will provide information for trekkers regarding food, rooms, and amenities in Annapurna teahouses. You will get simple sharing accommodations with meals containing traditional dal bhat. Teahouses provide a unique trekking experience through the warm hospitality of locals.

Regardless of whether you are a novice or seasoned trekker, learning about the environment in a teahouse will help you form reasonable expectations. This blog aims to help you prepare for the accommodations, food, as well as cultural experience that will be your Annapurna adventure.

What Are Teahouses?

Teahouses are family-owned guesthouses along Nepali trekking routes that provide trekkers with basic lodging and food so that they won’t have to carry camping equipment. Teahouses are simple stops along the trekking route with a sleeping area, kitchen, dining room, and bathroom facilities.

The main distinction between teahouses, lodges, and homestays is the purpose and the condition of facilities. Teahouses serve trekkers primarily for basic lodging and food, while lodges may be bigger and better developed, and homestays consist of sharing the home of a local family for cultural immersion, but their services are often less tourist-focused.

Teahouses are generally established at different elevations along popular trekking routes. In the lower elevations, teahouses have private sleeping rooms and western-style bathrooms. In the higher elevations, housing is much more basic, facilities may involve shared dormitory sleeping arrangements, and squat-type toilet facilities.

Teahouses provide invaluable support for trekkers with the basic economic advantages of lodging, inexpensive food, and a way to experience different aspects of Nepali culture. As with all parts of Nepali travel, the price and quality of the teahouses are very much based on the relative success of the trail; some teahouses are ply board huts and others are well-equipped guest houses.

Accommodation in Annapurna Teahouses

Room Types and Facilities

Accommodation in Annapurna teahouses offers shared rooms that consist of a wooden bed and thin mattresses. Blanket and pillow will be provided, but you need to bring a sleeping bag for extra warmth.

Typically, toilets are basic and shared, generally squat rather than Western-style. Showers are cold by default, but you can get hot showers for an extra charge. Heating is typically only available in common dining areas warmed by wood or dung stoves, while bedrooms will be unheated.

What’s Included

The teahouses operate in Annapurna provide blankets, but it is worthwhile carrying a quality sleeping bag as well, as it could be extremely cold at night at higher altitudes.

There are charging outlets, but they often have fees associated, charged either per hour or by device. Wi-Fi is provided in certain teahouses, usually for a fee and with slow or spotty connections.

Costs

The amount to stay in a teahouse varies greatly in Annapurna as accommodation costs are low in lower altitudes but increase as effectively as area altitude increases. The price in general is a reflection of remoteness and access difficulty.

In some locations, there is a “must-eat-where-you-sleep” policy, which is enforceable, meaning that if a trekker stops to sleep, they must buy a meal at the teahouse in which they sleep. This is a good way to support the local businesses, but it can also add to the trekker’s overall cost of trekking.

Foods in Annapurna Teahouses

Typical Menu Items

You will get porridge, Tibetan bread, eggs, pancakes, tea, and coffee for breakfast. For lunch, the teahouses serve Nepali staple food: Dal Bhat with multiple servings. You can also get dumplings, noodles, soups, pasta, and pizza on some menus.

Dietary Options

Annapurna teahouses have both vegetarian and vegan-style food options. Meals like dal bhat consist of vegan ingredients and are rich in fiber, protein, and carbohydrates.

However, these meal options will be limited in higher elevations due to logistical issues.

For non-vegetarian meals, ask the owner if the meat is frozen or fresh. If it looks questionable, then it is best to avoid it due to health risks. It is better to stay on plant-based diet while trekking.

Costs

In teahouses, food costs increase as trekkers pass through each region within Annapurna. Prices per meal are graded against stuff that needs to be carried by porters to the higher altitude areas, and options are fewer due to distance and transport problems. Meals typically cost between $5 $15, with meal pricing becoming more expensive at the higher camps where food is limited.

Amenities and services

Some teahouses in Annapurna have hot showers; however, they will usually cost extra. Most use a solar heating system, which is dependent on weather, as hot water may not be guaranteed on overcast or cool days.

Drinking water is usually sold either boiled or filtered to ensure it’s safe. Trekkers are encouraged to carry purification tablets and reusable water bottles, since there are refill stations on the routes, and refilling reduces plastic waste and keeps you hydrated.

In teahouses, guests can expect intermittent electricity, as load shedding is normal in remote areas. Many of the higher-altitude villages utilize solar energy, which will affect charging options and speeds, so bring a power bank as well.

Overall, teahouses in Annapurna will be functional, but will not be luxurious, to promote ecosystem functionality to meet trekkers’ essential needs within an extreme mountain habitat.

Challenges and Tips for Staying in Teahouses

Teahouses offer fewer amenities and worse options at higher altitudes in the Annapurna region, so you should know that as you gain elevation, they will have more rudimentary facilities and limited options. It is up to you to have a little more preparation than normal and to be flexible with your choices.

Don’t forget your hand sanitizer and wet wipes to stay as clean as possible when trekking for health and hygiene reasons. To keep your stomach from acting up, eat cooked food and try to avoid raw fresh salads, in particular in trekking areas where sanitation is limited.

During the main trekking season (October-November and March-April), you should book your room in advance. It is likely okay to fall directly into a room without having booked anything beforehand during the non-high trekking season. Just remember, by getting an early start, you will have many options for places to stay.

If you are ready to face these challenges, then your treks will more likely go better than they would have otherwise. Being aware of how altitude affects you, practicing hygiene, and maneuvering accommodation during your Annapurna trek will keep you comfortable and healthy.

Cultural Etiquette in Teahouses

When staying in Annapurna teahouses, it is also important to practice some basic etiquette. Most importantly, in many places, when you enter a space where people live, you will have to take off your shoes. Honestly, this is something that can be helpful too because it shows respect towards the host and is a nice gesture to the other visitors at the teahouse.

It is normal to be exceedingly generous with tips for guides and porters since they are working hard and putting in all the effort. However, tips for teahouse staff are welcome but are not expected. Other than tipping, you could also show gratitude through encouraging words and kind actions.

Your experience will be better if you engage with your hosts in a friendly manner. In addition, knowing some basic phrases in Nepali such as, “Namaste” (hello) and “Dhanyabad” (thank you), can help you build rapport with your hosts and demonstrate your respect for their culture.

Overall, these etiquette and cultural practices will help you develop goodwill and a much greater engagement during your trek. Remaining designed and respectful to your host and all that is offered at the Annapurna teahouse is a fulfilling experience.

Conclusion

Teahouses in the Annapurna region are not just simple but also warm and friendly. They supply comfortable rest, food, and cultural connection for trekkers in the midst of amazing mountain scenery.

In order to be prepared well, you should pack warm clothes, a sleeping bag, hand sanitizer, and power banks. Also, be realistic about the limited facilities and changeable conditions, so that the trek will be smooth and enjoyable.

Solo Trekking to Everest Base Camp: Is It Safe and Worth It?

Why Consider Solo Trekking to Everest Base Camp?

Solo trekking to Everest Base Camp offers you freedom and flexibility to create your itinerary. This allows you to set your own pace and take breaks wherever you want to enjoy the surrounding scenery. Additionally, solo trekking to Everest Base Camp is a journey of self-discovery because this trek will test you physically and mentally, allowing you to build confidence and resilience.

Trekking alone also creates an opportunity to experience nature and local culture on your own through independent interactions with nature and local people. This allows for more in-depth interactions and immersion in local culture in a more impactful way.

Trekking by yourself also creates the potential to meet other trekkers along the trail and connect with them randomly. Without being part of a fixed group, you and create new social experiences and possible friendships with all sorts of different stories to share.

Lastly, trekking alone with or without any tour package in Nepal is cheaper in comparison because you are not paying for a tour and guide. With careful planning, you can save the potential costs of the trek.

Safety Concerns of Solo Trekking to EBC

Altitude sickness poses the biggest safety risk when solo trekking to Everest Base Camp. Symptoms of altitude sickness start to appear when you reach an altitude higher than 3500 meters. Therefore, proper acclimatization is important to reduce the symptoms of altitude sickness.

The weather is unpredictable on the Everest Base Camp trail. You can see frequent snowfall, precipitation, and fluctuating temperatures on the trails. Rain causes slippery trails, which is quite dangerous. This condition allows you to be prepared with layered clothing and flexible planning during the trek.

There are trails to Everest Base Camp that will always be marked and easy to follow. However, there will be moments when it could become difficult to find your way because you are in a remote location. If you are trekking solo, you need to pay special attention so you do not get lost. If you have a good map or GPS device, you should have their safety in mind.

Emergencies always pose the biggest risk for trekking at this altitude. Medical assistance would be far from a village, and the additional cost of standard medical applies if serious health issues require a helicopter evacuation. Your insurance travels with travel insurance, and if you are going to be a solo trekker, know how to handle your emergency if you find yourself in one.

The risk of theft and scams is low, as it does not really happen at all, but non-zero risk for someone who is in a crowded area such as Lukla, Namche Bazaar, etc. As the Everest region is a safe place for solo trekking, it’s important not to avoid or dismiss caution and risk at the same time. Remember to be cautious, lock your belongings as suitably, and avoid foolish situations to minimize the risks.

Essential Preparations for a Safe Solo Trek

Physical fitness is important at Everest Base Camp. You need to do training that focuses on endurance, strength, and altitude acclimatization. Additionally, cardiovascular strengthening training and daily hiking with some weight will be beneficial.

When packing for the trek, always consider the essentials. Good trekking boots, layered clothing, trekking poles, a first aid kit, sunscreen, and hydration systems are the important things to consider.

A good rule of thumb for overall pack weight is a manageable weight in the region of 25 kg. Too much weight in a day pack will increase fatigue and affect productivity, especially over a long trekking day.

To go to Everest Base Camp solo, you will need a Trekkers Information Management System card and a Sagarmatha National Park permit. These permits can be obtained by your tour agency. These permits must be secured to comply with trekking rules and regulations.

It is now mandatory for solo trekkers to hire a guide, which will keep you safe because the guide, in many circumstances, can assist in deciding which route to take and in case an emergency arises. It is possible to trek to Everest Base Camp all solo, but based on your self-reliance, preparation, and calculation of risk, this option is more difficult.

Always note emergency contacts and have insurance that covers evacuation by helicopter. Reliable communication capabilities and travel insurance, which are consistent with your policy and the requirements for prompt responses, are also paramount during your trip for altitude sickness or any eventuality.

The Solo Trekking Experience: What to Expect?

If you choose solo trekking to Everest Base Camp, you will be staying in teahouses where you will be sharing the space with many other trekkers from across the globe. Sharing food and space with others like you creates social interactions and camaraderie, accompanied by many amazing stories, alleviating the loneliness experienced when you solo trek while enriching your experience even further.

From a mental perspective, solo trekking to Everest Base Camp is challenging. It involves solitude, physical exhaustion, and extending one’s limits. The need to develop mental toughness is equally competing for your attention in dealing with these challenges, and will help you remain motivated and diligent during your proceedings at high altitude.

Key highlights of this trek will include the scenery of the magnificent Himalaya, your encounter with Sherpa culture and hospitality, and the sense of accomplishment once at Everest Base Camp. These highlights provide some measure of toughness and reward that, regardless of the difficulties, a solo trek is valuable.

Is solo trekking to Everest Base Camp worth it? Pros and Cons

Pros

  • Personal accomplishment and self-empowerment through self-sufficiency and stressors.
  • Freedom to dictate the pace of travel, rest stops, and side trail exploration.
  • Only opportunities for connections with locals and fellow trekkers as you see fit.
  • Potentially savings by eliminating guides, porters, and group tour fees.
  • Customization of route and lodging without any group constraints.

Cons

  • Greater safety risks from the absence of immediate support during emergencies or altitude sickness.
  • Loneliness and anxiety could affect mental wellness in isolation for prolonged periods.
  • Logistics of permits, exigencies, accommodation, and transport independently would exacerbate.
  • Navigating alternative routes or trail changes in the absence of expertise can be challenging.
  • Higher costs for a porter for last-minute help or an emergency evacuation.

Conclusion

Solo trekking to Everest Base Camp is risky because the dangers may come from the altitude and from unexpected situations. However, if you have made the right preparation, it is still a safe and fulfilling journey. The stunning views and the local people have made it a very special trip to remember forever.

It is very important to be honest with yourself about your condition, your emotional preparedness, and your capability in organizing before deciding to trek alone. The best way is to get a guide who will surely improve your safety and assist you in finding your way, as well as provide expert support that is not a fight with independence but a balance.

Trekking alone to EBC provides a very personal experience of self-awareness and self-determination. The difficulties that you encounter and the friends you will be able to make will give you a lot of new memories.

Meet Our Sherpa Team -

Passionate Experts Behind Your Trekking & Climbing Adventures!